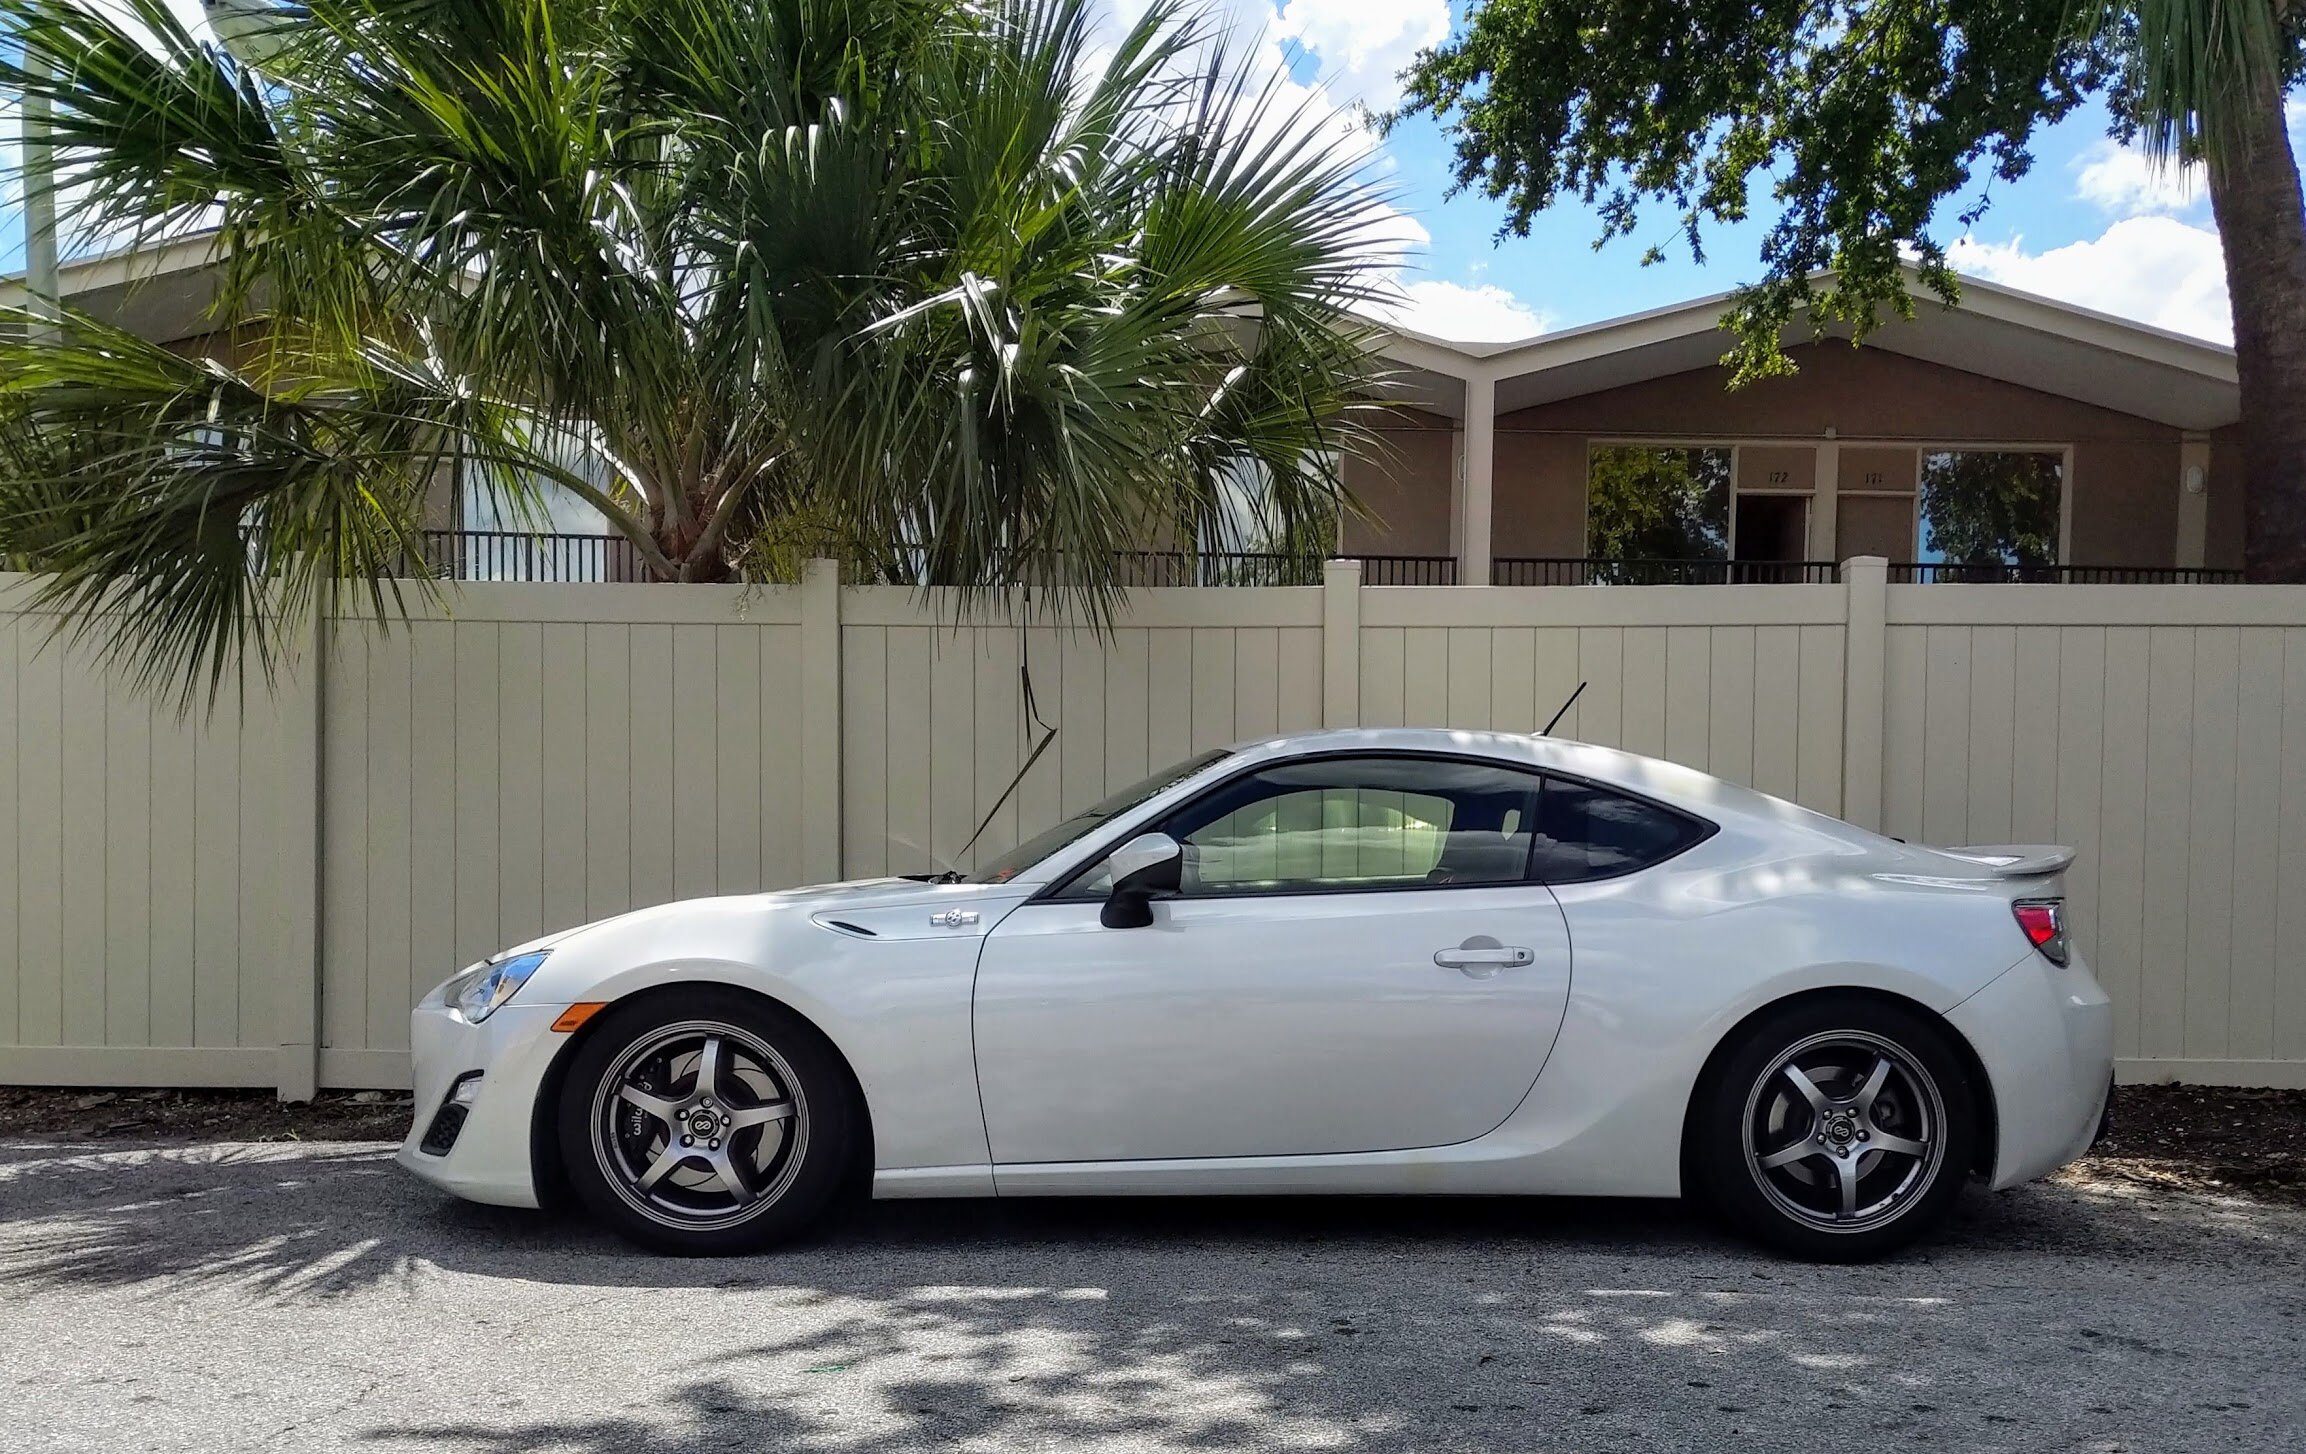
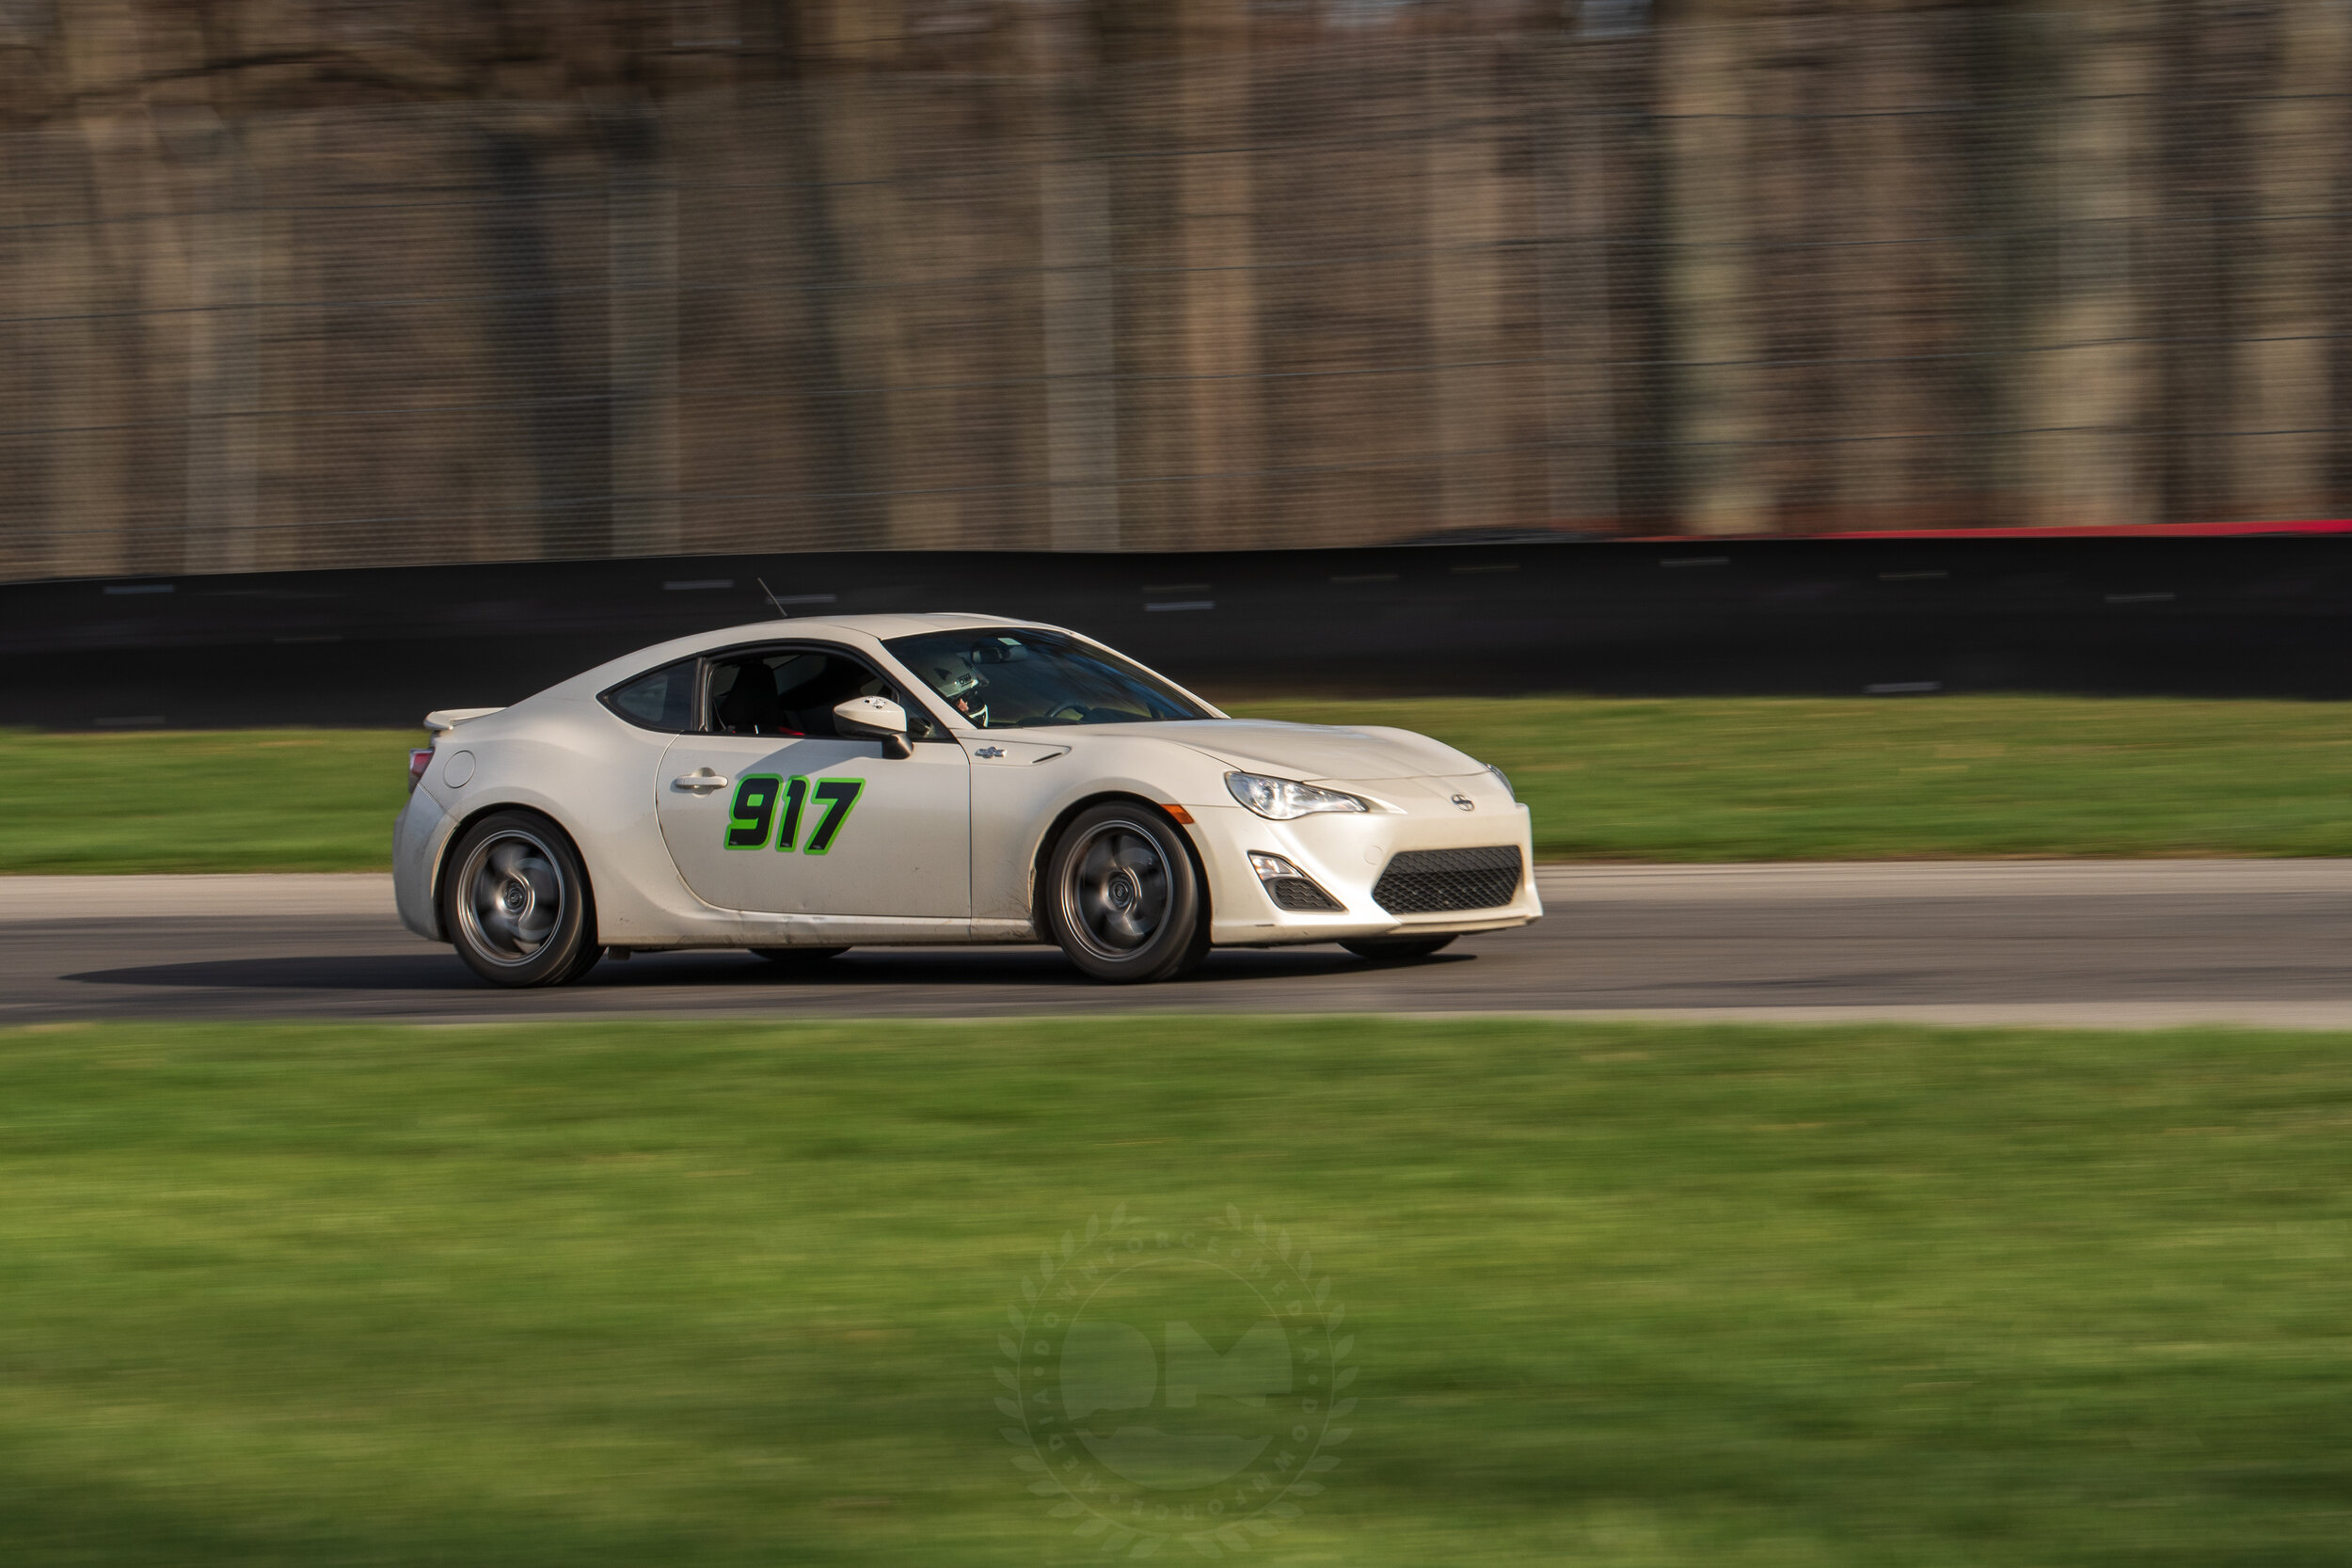
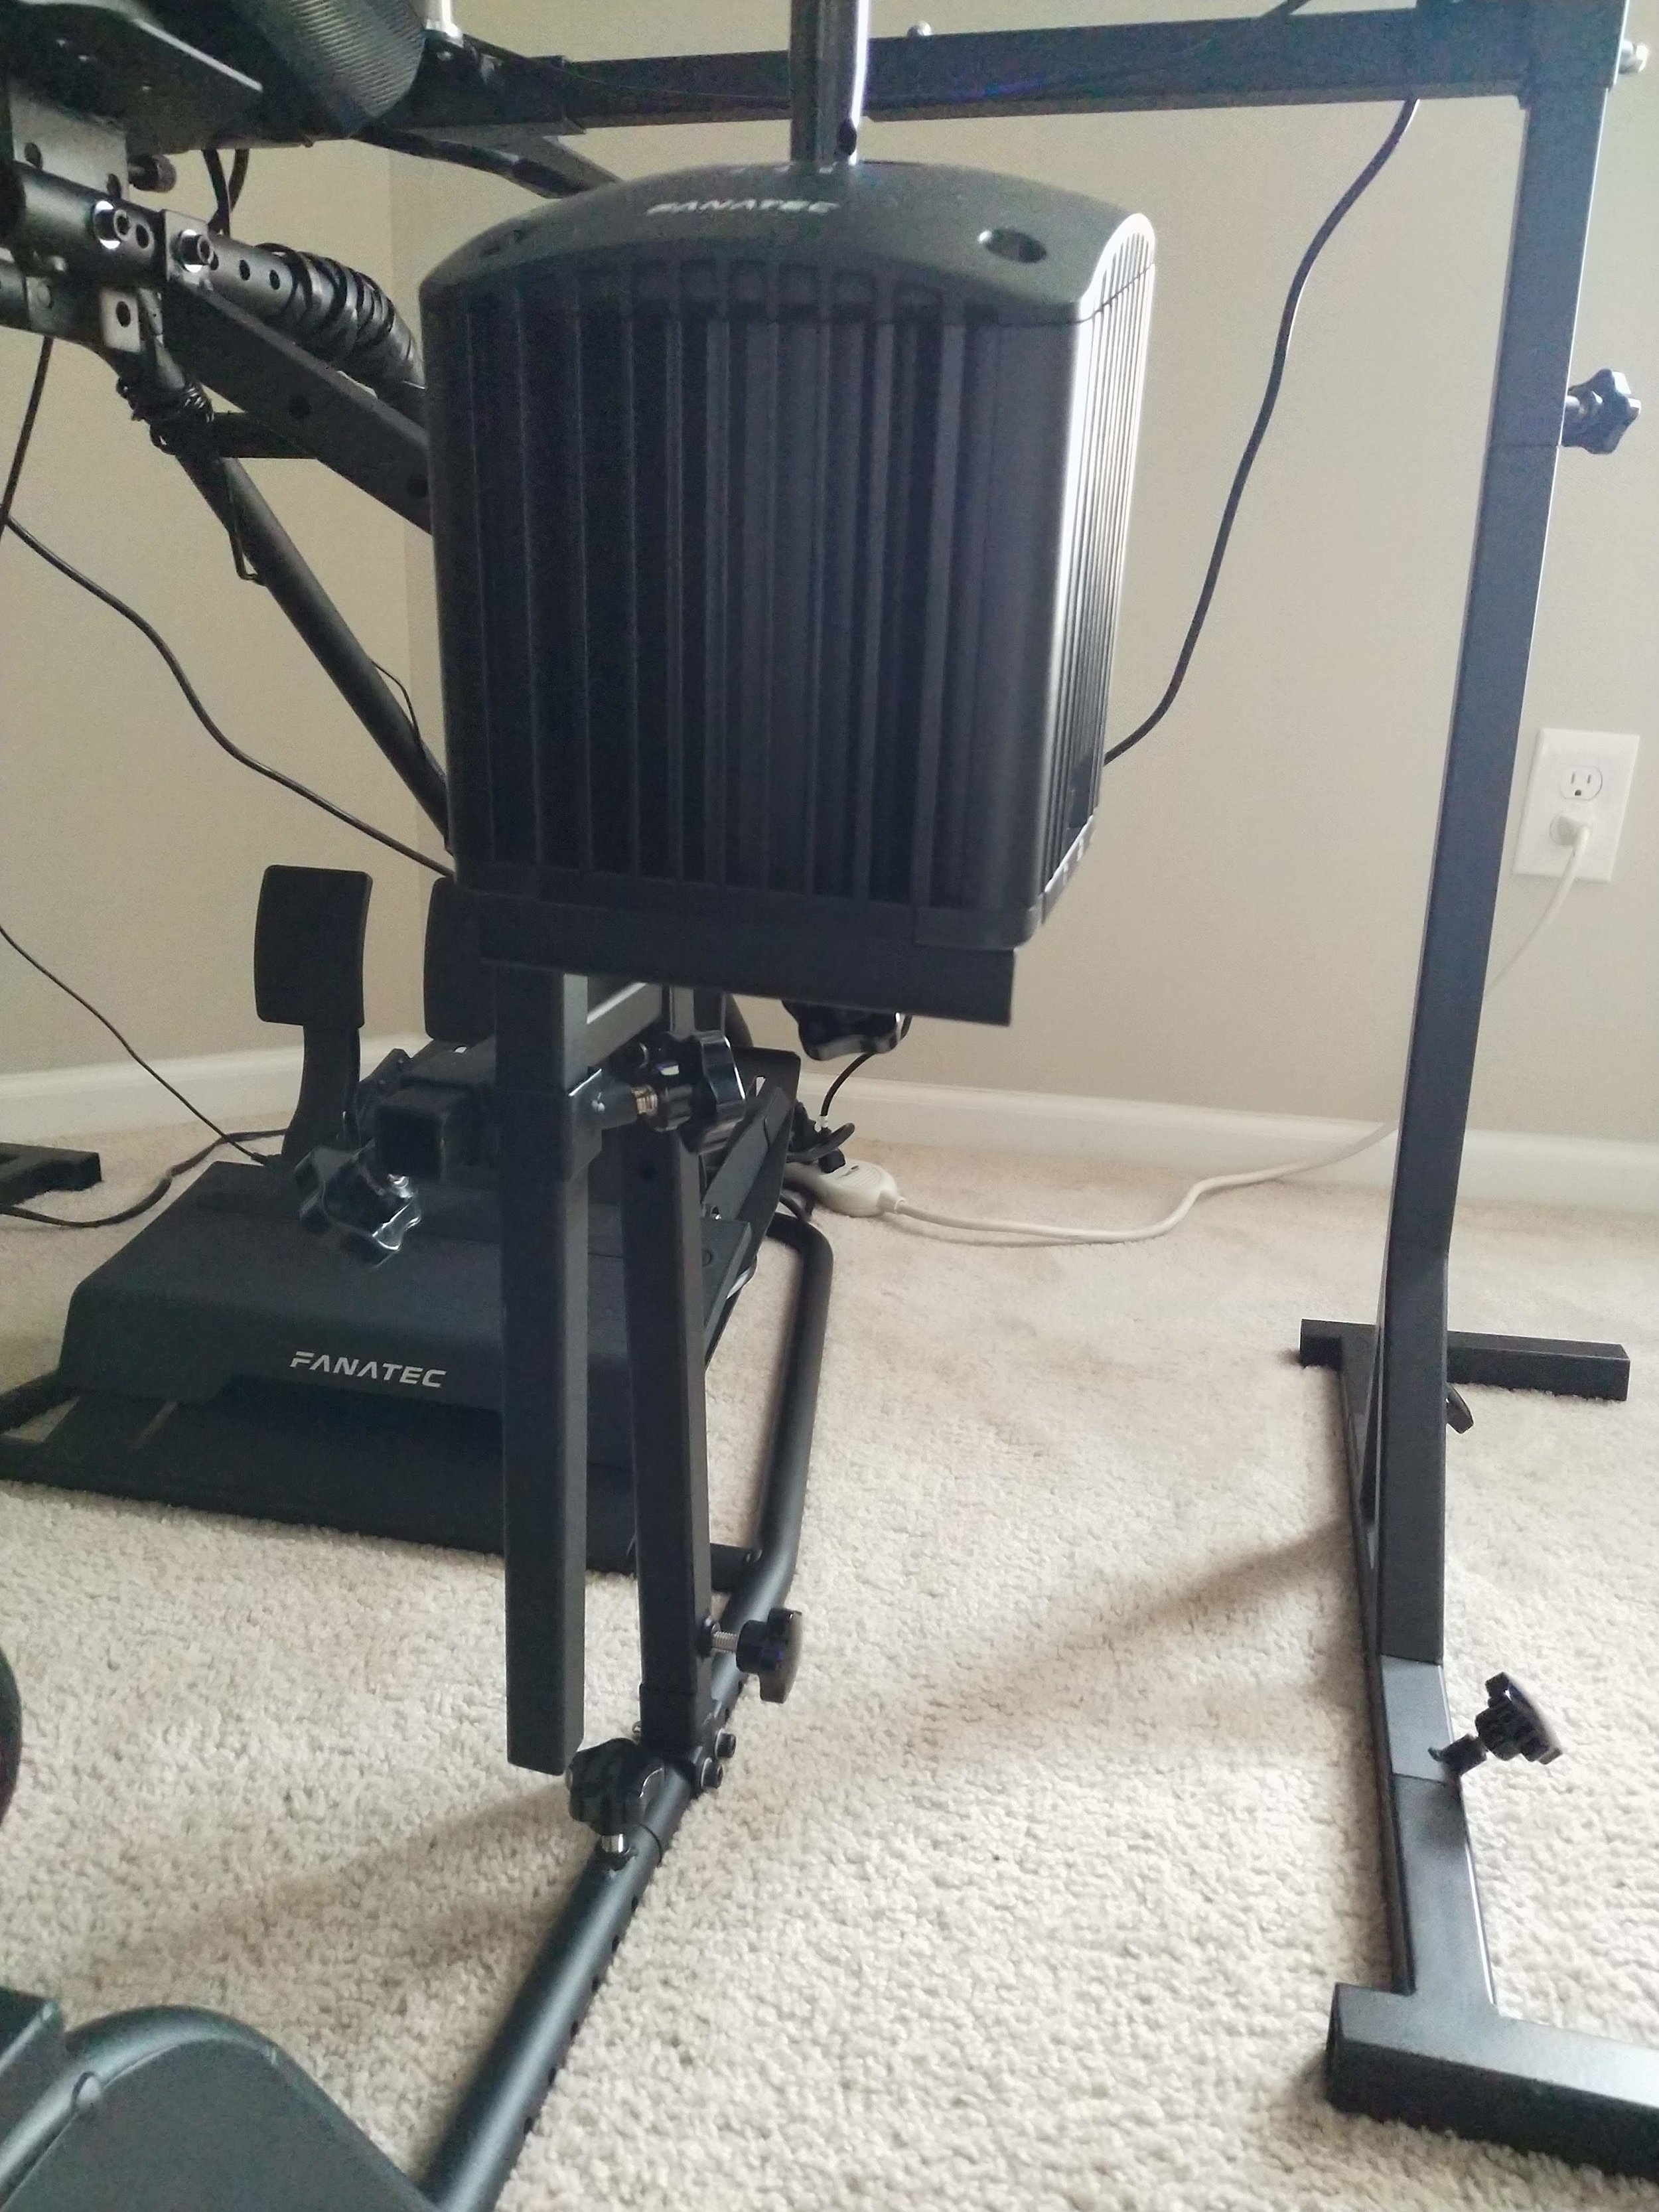
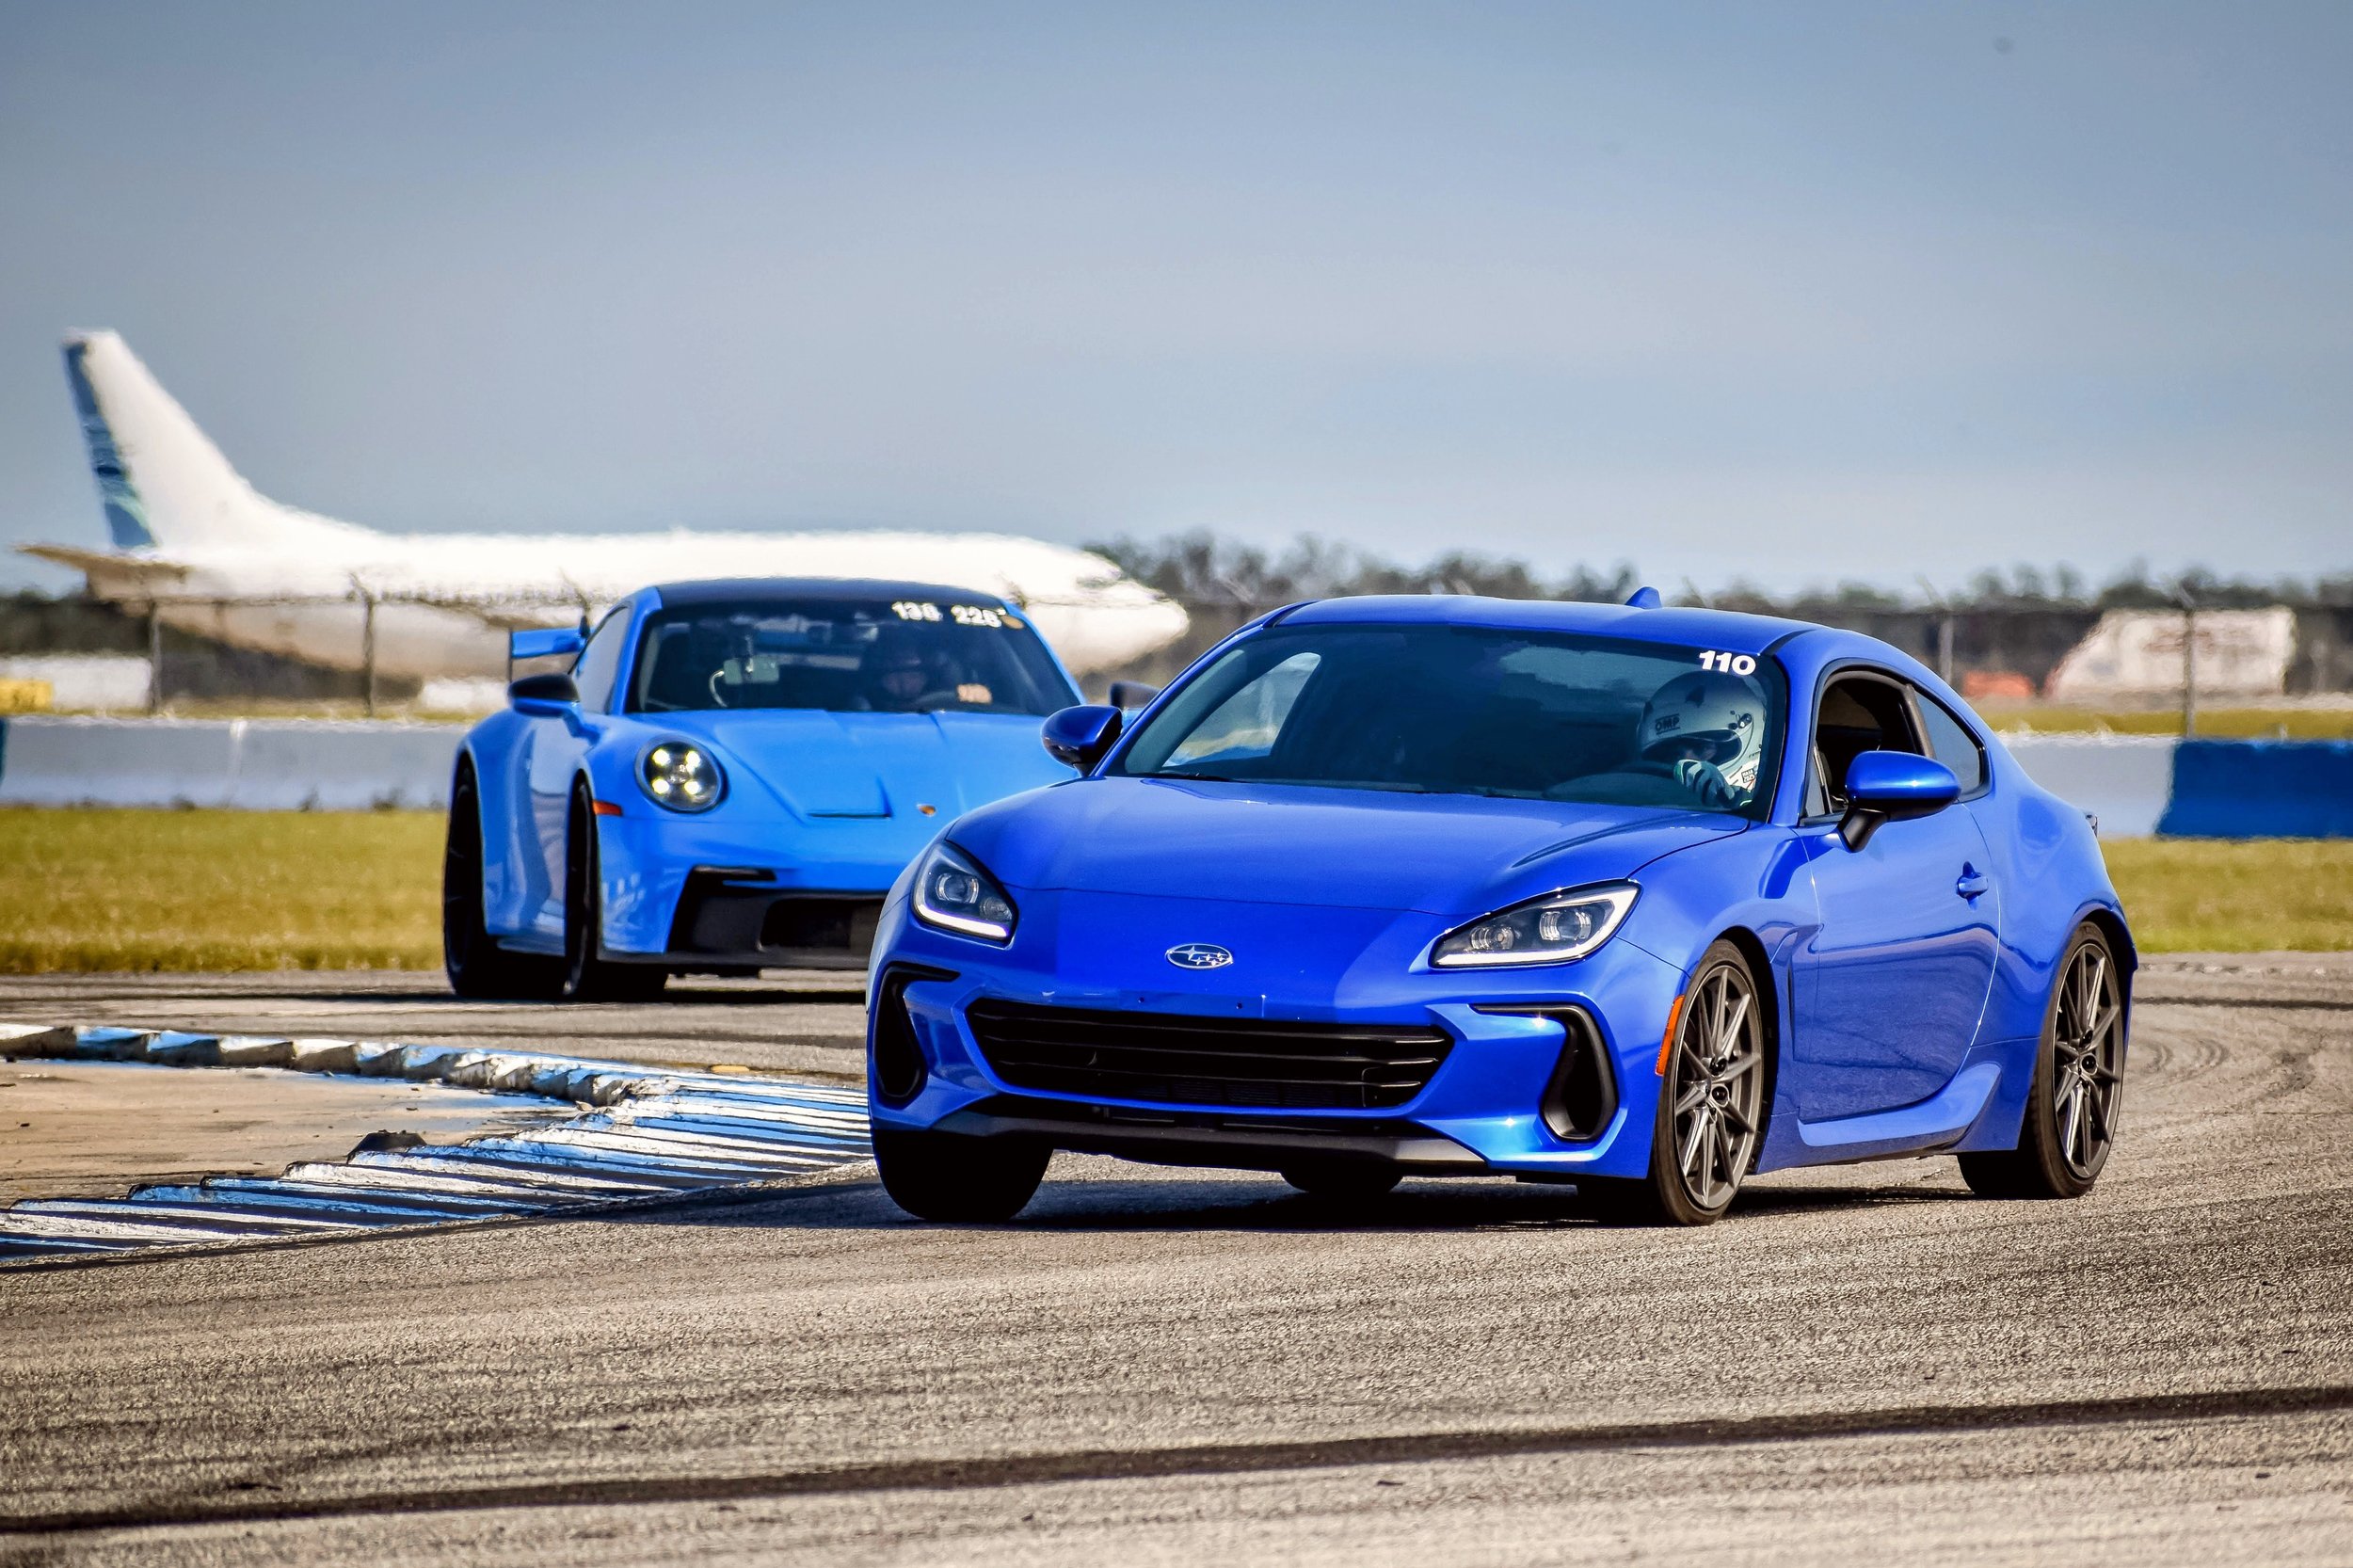
2023 BRZ Track Impressions!

It took a while, but I was finally able to break in my new BRZ. Since I work from home it took a while to get past the clutch and engine break-in. I actually crossed over 1000 miles while on track because I cheated a little bit. Don’t worry though, I did change my oil beforehand to make sure and shavings were flushed!

I thought about going to the FIRM since it’s a much easier track, but I have a lot more comparison data at Sebring with the S2000. Plus, it’s a lot more fun. Since it was December in FL, along with a cold-front, it was a pretty chilly 50 degrees outside. No rain and perfect throughout the weekend: ideal track weather!

I wanted to get a stock baseline on the car in case I ever decide to mod it, so the only modifications on the car were brake pads and fluid. I went with ATE-200 fluid, same as I always used on my S2000. For pads I have Powerstop PSA front track pads and Hawk HP+ street pads in the rear. The reason I ran this setup is because this is the same combination I used on my FR-S with no issues. However, this setup was not adequate on this car, at least with my driving style. I am a pretty hard and late braker, whether to the benefit or detriment to my lap times, but that did not result in any confidence in the brakes. It’s most likely because of the added speed of this car (details on this below) but the brakes were not up to snuff with my driving style. I don’t want to blame the car just yet since I wasn’t running a true track setup like on my S2000, but I was hoping for more in this department. It might just be time to start designing some ducting for this car!

Besides the brakes, the car was a true joy to drive. I am a big hater of understeer and expected to be fighting the car the entire day like I did with my FR-S. To my delight, however, the car was a lot more neutral than I expected. I have not added any additional front camber so I was pretty shocked with how willing the car was to rotate. It wasn’t quite like the S2000 that you can easily rotate the car by lifting off the throttle, but it also did not plow through the corners like my FR-S did (even though that car did have coilovers and camber bolts). Even the stock Michelin tires lasted about 10-15 minutes into the session before they clearly were starting to fall off. I set the tires at 28PSI cold, which got to 33PSI hot and didn’t touch them throughout the day. The live tire pressure gauge on the dash was a welcome addition to easily keep track of tire temps for me. Keep in mind my last car was a 2002 so I haven’t been spoiled by modern tech just yet!

In terms of raw speed it’s going to be hard to compete against this car. Against a S2000 or another car in this class, I can’t see how anything is going to stand a chance. With coilovers and wheels/200TW tires I can see this car being able to get under 2:30 at Sebring, which is very fast. Even going through T1 I was already at 80-83mph consistently. My top speed at the back straight before Sunset was 125MPH. Both of those speeds are competitive with MODIFIED S2000s, and this was with a passenger in the car with me. The added power and torque made up a chunk of that time, but this car is a lot more stable at speed than a S2000 without a wing. You can confidently be flat through Bishops bend and the car is a joy before Tower as the rear end is on the brink of adhesion. The difference in aero between the two cars is easily apparent on track.

Some of the other things I enjoyed were the stock seats and seating position. The first-gen car was already great in this regard, but this iteration improves it even further. The stock seats hold you pretty well for mid-level summer tires and the car is pretty easy to heel-toe in. Thankfully the pedal dance is gone and going into all-off mode is just a few seconds away with the press of a single button. The gauges also change into something similar to a S2000 when in this mode, which makes it easier to monitor the tachometer. The car has a build in shift-beeper and thankfully money shifting isn’t as common in these cars because of the longer gates. With the built in oil cooler temps did not exceed 240F, but it was a pretty mild FL day relatively. Regardless, it’s nice to have all of these features build in stock and not have to worry about adding them.

As for complaints, I only have a few, but they do exist. The main problem is the wind buffeting noise. On the street it’s not as bad as others online have stated, but on track it’s pretty dreadful. At 100+ speeds, I found myself distracted and focusing on it even with having a full helmet on. I can see people easily getting a headache if that sort of thing bothers them. I have seen some solutions online that I will need to try out. The second I am not as critical as others, but I do wish the exhaust made more noise on the track. The “fake” noise is pretty good to gauge when needing to shift, but for heel-toe the car would be a lot easier to rev-match if it made some real noise. I do want to get an exhaust eventually, but I actually kind of enjoy the piped in noise on the street.

All-in-all this track day made me appreciate this car even more than I originally did. It’s a joy to drive on the street and now it’s just as rewarding on the track. I think I finally have found the long-term successor to the S2000 that I have been searching years for. It might take some time, but I do have some plans for this car that I’ll try to keep everyone updated on.

If you have any questions, feel free to reach out. I tried to summarize my thoughts as best as I could, but I’m sure I missed something!

2023 BRZ First Impressions

My 2023 Subaru BRZ is finally here!

I think I may have finally found a replacement for my S2000 that I am actually satisfied with. I thought my ND would scratch that itch but it just didn’t feel right. It was great because it was a convertible, but it didn’t feel special outside of that.

The process to get this BRZ was an event in itself. I am in Florida and called dealers as far north as NJ and far west as TN, but I still couldn’t find one at MSRP. Then one day I got a call from the dealer 20 minutes away saying they got an allocation, and at MSRP at that! I promptly put my order in and the waiting game started. It took about 4-5 months for the car to actually come in, but I am very happy I was patient since I got the exact build that I wanted. I ordered a 2023 Limited (actually the top model) in World Rally Blue. I also ordered the front lip and trunk spoiler, but both were on backorder when the car came in. I plan on still adding the front lip but I think I am going to wait and get the GR86 duckbill spoiler once the modding itch starts.

I’ve probably only had the car about a month now and just hit 500 miles. Now that I can open the car up I can really see how different this car feels compared to my FR-S. The torque dip truly is gone and the car feels VERY eager to rev. It honestly doesn’t feel much like a Subaru engine. The power is definitely underrated as well since it feels quicker than my S2000 ever did. Even staying in a higher gear the 2.4L really does shine. I have never owned a torquey car, but this feels miles better than the F20/F22 did on the street. It does not feel as special as those two motors did, but as a daily this is much improved.

Even outside of the motor this doesn’t feel much like a second-gen but an entirely new car. Every single aspect of the car is improved comparted to my FR-S. The interior materials feel exponentially better, the steering wheel is the correct size and location, and the infotainment is actually pretty snappy. Android Auto works very well with wireless dongles like my MA-1 not having any issues. The touchscreen is also not locked out like other cars while a phone is connected. Since it is based off the same chassis, the backseat is as useless as it’s ever been unfortunately. The one thing that the S2000 has always had an advantage on is the shifter, but I think this one is very close to matching it. The throws are definitely longer so it’s not as fun on the street, but in a performance setting I think this is the shifter I would go with. It is much harder to money shift this car so it gives a lot more confidence when banging through gears. The seats are also great at being comfortable on the street, while sufficient on track without needing buckets. My goal for this car is to keep it very much a street car that I can track without a hassle, so it really is ready to go straight away.

I haven’t been able to track the car yet because I have been traveling a ton, but track pads have arrived and I should be able to finally get her to Sebring sometime in November. I am guessing it will have some understeer issues until I am able to dial in some more front camber. Thankfully they got rid of the pedal dance so getting into track mode is as simple as holding a button. This also changed the gauges into a horizontal tach similar to the AP1, which is a nice touch. They even included some simple, but much appreciated, features like a programmable shift light and beeper.

I only kept the ND for just over a year but I have a feeling I will be enjoying this car for years to come. I don’t see anything coming out in the foreseeable future with this price tag, RWD, and genuine enjoyability. If you have any questions on the car, or things I may have missed, feel free to let me know and I will try and cover it. It truly is a joy to drive.

Stay tuned for track photos and impressions!

Product Updates + Sales

We are currently testing V3 S2000 rear brake ducts because the V2 are also failing at a higher rate than we are comfortable with. They will be tested this weekend at NASA Champs and then be made available if everything goes to plan! Right now they are much more robust and have less parts than the current V2 ducts, with a smaller footprint as well.

Here is a look compared to the old V2 duct:

Sneak Peak.PNG

Also, a lot of parts will no longer be restocked when current stock is out. All current endplates will be the last batch because demand for them is not enough to keep them in stock. Once they are out I will post up DXFs and STPs so people can make them themselves.

Almost all parts are also currently on sale to try and clear out some old stock.

S2000 vs. ND Miata vs. FR-S

The question that has plagued the internet for years now! Now that I have owned all three of these cars I’d like to chime in on my opinions between the three. While a lot of online reviewers have driven them back to back, I don’t think many people have had the privilege's of living with all three of them. I have used all three as a daily driver, modded them, and driven them on track. I will try my best to touch on all of these subjects and then let you decide which works best for you.

I haven’t owned many cars (5 total) in my life but what I have realized by now is to find a car that is best at what you care most about. Instead of wanting a car to be just like another, learn to love what makes it stand out. I will give more examples of this further down the article, but it’s something I wish I realized earlier.

I will give a brief story of each and then give my comparisons at the end. If you have any questions or feel like I missed something feel free to comment and I will do my best to address it.

HONDA S2000

The first car I owned of the three was the Honda S2000. I bought my 2002 AP1 back in 2010 when I was in college. I drove one at an autocross in high school and was in love with it ever since. The car is and was my favorite car of time. I kept it 100% stock for about 5 years of ownership and daily drove it to school/work that entire time. In those 5 years I only had one mechanical problem: my clutch master cylinder was leaking and ran out of fluid one day. I think an aspect of this car that gets lost in the shuffle is how reliable it is.

While stock I took several road trips to tail of the dragon and tracked it a few times a year while I was getting my undergraduate and graduate degree. Outside of brake pads and high temp fluid, I did not mod the car at all during those track days. I hope everyone gets to track a stock S2000 one day to truly see how capable this car is.

Once I finished school and had more time/money on my hands the car slowly began it’s transformation as a track only car. I tracked it in autocross STR form for a while and even went on road trips to Road Atlanta and VIR in this form. I think that time period was when I enjoyed the car the most. It was a slight compromise on the street because of the coilovers, but it was so well rounded that it did not bother me. If I could rewind time I would have left it here and never turned it into a racecar.

JB-mid ohio-7.jpg

I then sold the car at the end of 2020 in full NASA ST5/TT5 trim. I actually drove the car to and from the track in this form because I do not own a truck/trailer.

When actually purchasing one of these cars, I think it needs to be said that this car is old and kind of hard to find nowadays. Parts are becoming more expensive and rare, so I think it is a big factor that the car is ~20 years old and relatively the same price as the other two.

SCION FR-S

In 2017 was when I first transformed the S2000 from daily driver into a track only car. I was able to do this because I bought my 2014 Scion FR-S to take over daily duties. The car came lightly modded with lowering springs, exhaust, and an oil cooler.

When I first bought it I was really angry with the purchase. All I wanted was the car to be the S2000 since that’s all I knew for a while. I remember being unhappy with the shifter and clutch hydraulics, the sound, and lack of edge that the S2000 has.

IMG_20180608_151018.jpg

Once time passed I started to realize what really made these cars shine. I ended up moving to Detroit for a few years and this car not only was my daily, it became my winter car as well! I slapped Blizzaks on the stock wheels and had no issues in the winter. Note: I would routinely be sideways through intersections and got some wild looks, but it was all worth it!

I ended up tracking this car as well, with only Powerstop track day pads and ATE200 fluid as prep. A buddy of mine co-drove it with me at Gingerman and Sebring, and the car had no issues getting abused all day. It is understated just how important being able to take an extra set of tires to the track is. I could comfortably fit 2 people, 4 wheels/tires, and all of my tools in this car. In the S2000 I was only able to bring my R-compounds when there was 0% chance of rain and I would just drive them to the track.

JB-mid_ohio-4-15-19-88-(ZF-10226-81464-1-002).jpg

On the same day as I sold the S2000 I also sold my FR-S. I got a great trade-in offer that was much greater than I purchased the car for so I had no choice but to sell it. I even thought about keeping it regardless of the offer but in the end logic prevailed.

Even though these cars share similar power/weight specs this car feels a lot slower than the other two according to the butt dyno. When full throttle this car feels like you’re just waiting for it to speed up and never really gives a sense of speed like the other two cars do. It’s really weird and I’m not sure if it’s the torque curve that everyone talks about or if the car is genuinely slower.

In terms of aesthetics the FR-S is my favorite of the three. I love the silhouette of the car and I think they did a fantastic job designing the car. If this car was a hatchback like the RSX or 240SX, it would have been a slam dunk.

MAZDA MX-5

Finally, I bought the ND1 Miata once the others were sold. This car also came lightly modded with lowering springs, sway bars, and some cosmetic upgrades. I had the car shipped from Denver. It barely has any miles on it because it was a summer only car.

IMG_8615.jpeg

When I first got the car I was unable to really drive it because of the ergonomics. I bought the ND1 model which does not have a telescoping steering wheel like the newer model. I found the seating position almost unbearable, but luckily the ND2 steering assembly swaps right over. It was about $300 in parts from Mazda and an hour of work. I highly recommend this upgrade for any ND1 owners.

It took a little while to get used to the Miata as well coming from the other two. The shift knob is so small from the factory it feels like you’re pinching salt and needed to be replaced immediately before being able to judge it fully. Funny enough, the shifter that I used to complain about in the FR-S was something I found myself missing!

In daily form this car truly shines. It is by far the most comfortable of all three cars and gets an absurd (awesome) 35MPG on the highway. The clutch and brake pedal is also the best of the three. I’m not a fan of the throttle pedal rotating from the bottom, but I’ve learned to get used to it.

DAILY DRIVER (HARDTOP)

Since two of these cars are convertibles, I am going to compare them if you are going to opt for a hardtop or RF ND. I feel like going for the hardtop takes away a lot of the charm from both the S2000 and ND. They are both cars of two personalities. If you are not a fan of convertibles, I think the FR-S is the best of the three. Even with a hardtop the FR-S is much quieter and has a lot more space. I personally am not a fan of the S2000 with a hardtop. If it did not come as a convertible, I would not have bought the car. I have also driven a RF ND and it is more of a t-top rather than a full convertible. It did not give me the same sensation that the soft-top models do. When I was shopping for the car, I did not have any interest in the RF version.

The FR-S is a great daily not only because of being a coupe, but it is the most well-rounded. I had no problems doing Home Depot runs in the car and never had to borrow a friend’s car. The S2000 is pretty much only good for grocery shopping and the Miata has even less room than the S2000. The benefit of the back seats does give a lot more storage and convenience as well, especially for a student. They’re not very good for putting people back there, but great for a backpack or other equipment.

It might matter to some, but the FR-S is also the best choice if you have to fit a child seat. I don’t think I would ever fit one in the ND or 06+ S2000, even if they are able to turn off the passenger airbag.

I would rank this FR-S > ND > S2000

DAILY DRIVER (SOFT-TOP)

I am going to exclude the FR-S here since it does not have a convertible option. If your mind is set on having on of the convertibles as a daily, I would recommend the Miata. It is much more comfortable, gets much better MPG, and is the most fun driving around town. The low-end torque and the gearing is much better than the S2000 so it genuinely feels faster around town. The ergonomics are also better for daily driving since it has the option of the telescoping steering wheel. The AP2 does have better gearing than the AP1, but it still doesn’t come close to the ND in terms of daily torque. I am also a driver that rarely touches VTEC going around town so I don’t think I get the full benefits of the S2000 around town.

Also, the manual soft-top of the ND is actually much better than the electronic S2000. I could have the top up or down in the ND in about 2 seconds. This might be an issue if you’re up there in age, but I would much prefer if the S2000 did it the same way. If I am cruising down the street at 30MPH and it stops raining, I just go ahead and put the top down with one hand without having to wait for a stop. It also has one center latch, rather than two of the S2000.

With the ND being a much newer car is also has a lot of creature comforts the S2000 lacks in. One of my killer applications is having keyless entry and the S2000 has a whole sequence just to turn it on. Having NAV and Android Auto/CarPlay support is pretty big for me as well.

I would rank this ND > S2000

DAILY DRIVER/WEEKEND WARRIOR

I remember Speed Academy being asked this question between their FR-S and S2000 and not agreeing with them picking the FR-S. However, now I agree that is the better choice. It is a huge benefit to be able to have track wheels and tires in the car. Not only that, but you don’t have to worry about cutting up the interior for a roll bar or passing broomstick tests. The drive to and from the track is also much better in the FR-S than the other two. Driving to the track in the S2000 felt like a chore whereas in the FR-S it was comfortable and easy. Another thing to mention is the FR-S comes with much better stock seats than the S2000 and ND does. I did not feel the need to upgrade those to a bucket, but in the other two it’s kind of a must if you don’t want to be sliding around.

I don’t feel like the ND makes a good track car in stock form. It is very soft, which makes it great for a daily, but it doesn’t translate well on track. I think it needs a few more mods than the other two to make it more fun on track but they would heavily compromise the car as a daily driver.

I would rank this FR-S > S2000 > ND

TRACK ONLY CAR

This is where the S2000 shines, but the FR-S comes a close second for me. I actually think the FR-S has a higher ceiling because of the aero and coupe benefits, but just lacks in the power department. The S2000 is just such a gem in terms of performance. As you probably already know, there is nothing like a 9000RPM redline and the neutrality of the S2000. It is the hardest to drive of the three, but also the most rewarding.

The FR-S might be a better choice for beginners because it is much easier to drive at the limit. I don’t see enough reviewers talk about this but I think the car has way too much understeer and I had to purposely tune the car to get it to rotate. The benefit is it’s pretty much impossible to screw up in and rarely makes you feel like you’re in a dangerous situation.

As I mentioned a little bit earlier, the ND needs more work than the others to make it track capable. A set of Ohlins and stiffening up the car would transform it into another animal. I think a well prepped ND would absolutely spank the other two because of it’s underbody aero benefits and light weight.

I am assuming a track only car has a truck/trailer even though I didn’t. If you have to drive to the track like I did, get the FR-S.

I am really torn between the two cars here because the S2000 is more fun as a track car, but the FR-S is so much more economical and practical as a track car.

I would rank this S2000 > FR-S > ND

PARTS AND MODDING COMMUNITY

I felt this topic should be taken into account as well. A good community means a lot to me and greatly impacts the ownership experience. Back when I first got the S2000 the online community was at it’s infancy and only similarly minded people owned it. Once the car got cheaper is when the community exploded. There used to be only a few wheels options back in the day, but now there’s a ton!

As it stands now, the S2000 community is beginning to die down. Parts are becoming harder to find, especially longblocks. Expect to be about $4000 in the hole if you need an engine replacement.

The FR-S community is not as track oriented as the S2000 community is, but they are much more into modding. Stock parts are dirt cheap and plentiful. For example: a set of front headlights is $80 compared to $600 for the S2000. There are not as many FR-S track owners as there should be, but there is a lot of aftermarket support. This car is by far the cheapest to mod and fix if something happens.

As for the ND from my observations their owner base seems to be older than the other two. The modding and track community seems small right now, outside of STR autocross. The good news is they have a factory club car so there will always be a plethora of aftermarket support for the car. I think the price for parts right now is high, just as it was for the S2000 when there wasn’t a lot of competition.

FINAL THOUGHTS

In order to make a final decision I think it’s better to know what purpose the car will solve and then decide from there. Even though they are all similar cars, they really shine in different ways. The S2000 will always have a special place in my heart so it is my favorite of the three, but I have to acknowledge it’s getting up there in age and doesn’t make a lot of sense anymore.

If I had to start over today I would wait and see how the Gen2 BRZ/FR-S turns out. If they solve the speed issue it has the chance to blow the other two out of the water in terms of performance. It will not have the convertible aspect to it, but I have a feeling it’s going to be a truly great car.

I hope this was helpful and/or insightful. There are a lot of difference factors involved so if you feel I missed something or want my opinion on anything else feel free to comment below and I will update my post!

Thanks everyone and happy car shopping.

Offset Bushings V2 are here!

After months of waiting, I finally received my second batch of offset FUCA bushings in from machining. I made a few small changes from the initial batch, which I will outline here.

I have close to 50 sets of bushings this time so it’s a pretty big batch!

IMG_20200826_141648.jpg

As always, a set will include enough bushings for both L and R sides. A total of four thick bushings (outer) and four thin bushings (inner).

IMG_20200826_141730.jpg

The first changes come to the bushings themselves.

  • Added chamfer to leading edge to make it easier to align to the control arm for installation

  • Added corner relief which allows a perfectly flat seal when pressed in

IMG_20200826_141815.jpg

Next change is to the inner sleeves. For the first batch I actually bought a long piece of stock and hand cut them one by one to the correct length.

  • Now made individually from 304 Stainless Steel

  • Tighter inner diameter tolerance

  • Tighter outer diameter tolerance. Now a slip fit before the bushing is installed, which turns into a light press after the bushing is installed and naturally compresses, making installation easier

  • Small chamfer on outer diameter, making installation easier

IMG_20200826_142011.jpg

Just like before each set comes with 8 washers and 4 set screws.

For installation instructions: https://baero.tech/offset-bushings-install

Order yours today!

Aeromotions Wing Endplate Study

Recently got dimensions of an Aeromotion’s wing and figured I would do an endplate study. It’s been quite a while since I’ve done one of these!

So far I have gotten rave reviews on my APR endplates, Voltex endplates, and most recently the 9-lives endplates. My goal is always to try and have as efficient of a car as possible. So while some setups will create more downforce, if it doesn’t improve our L/D I usually don’t put it on my car. What a more efficient endplate allows you to do is decrease angle of attack, but still achieve the same downforce levels at a previously higher angle of attack. This allows you to keep the same aero balance of the car, but get some free lap time on the straights. In that regard, some would say I subscribe to the current design philosophy Ferrari employs, even if they’re not doing so hot!

Anyways, let’s jump right in!

I have to mention - I love Russell’s Evo 10. The small airdam to run the front splitter lower to the ground, the dual front dive planes, hood exits, and blockoff plates are all really functional. I was contacted by him to try and get a little more downforce out of the rear wing as he is starting to max it out. I’ll leave some pictures below to show you the car these endplates are being designed for.

20200613_101745_resized.jpg
_MG_1670-Edit_resized.jpg
_MG_1635-Edit_resized.jpg

The first thing I did was run just the airfoil in a free stream, with no endplates. I like to do this in order to see the pressure distribution of the airfoil to better understand it’s characteristics. Even before seeing the results, I can see what the design philosophy of this wing is. It is clearly designed to be uber efficient, with the sacrifice of top end downforce (aka exactly what I like!). The pressure surface has almost no camber to it, while the suction surface has a fairly subtly leading edge to discourage separation. If you look at the streamlines below, you can see there is a tiny laminar bubble forming on the pressure surface, while the suction surface separates towards the trailing edge. This would not be the case if I was running an infinite wingspan, but I am running it at 1650mm (same as Russell’s wing).

In hindsight I should have removed the endplate mounting holes before doing this run, but I don’t think it would have made a huge difference. I was mainly looking for a visual on the streamlines.

Airfoil.JPG

The next thing I did was gather baseline results. I added the stock endplate and ran the wing at 80/100/120/150MPH with and without a gurney flap. Russell is currently running the gurney, but still has some AOA left. I usually recommend always using all available AOA (before stall) before touching a gurney flap. While a gurney immediately adds downforce, it is not as efficient as adding AOA.

With EP.JPG

Before I continue, I usually want to be fairly confident in the baseline results, or else the data does not mean much. I could not find CFD data on Aeromotion’s site, but Russell had some on hand. The trends actually matched my results very closely so I was confident I was on the right track!

You can see the results I go below. All of these results are at 0 AOA. I have not had time to run at different AOA yet, but I am confident it will have a fairly linear trend from what I’ve seen compared to the stock Aeromotion’s data.

There are a few things that I am very impressed with already. If you look at both of the results below, the efficiently stays almost exactly the same throughout. Most wings that I have investigated have a varying efficiency as the speed increases. The reason I really like this is because the wing is very linear and predictable. After perusing through their site I see that they also sell an active wing package with the same airfoil. After seeing that this wing makes total sense because it makes it really easy to adjust aero balance. Since it has a linear trend, it’s very easy to calculate how much wing you need in different power limited or grip limited situations. I really wish that active systems were legal in more amateur racing series as I would love to be able to test their system.

Base results.JPG
base results - gurney.JPG
Aeromotion’s data sent to me

Aeromotion’s data sent to me

I tried several different airfoil shapes to see what the wing would react to the best, but most were not performing as well at the stock wing. So I decided to just try and optimize the current shape as much as possible. I incrementally increased endplate volume in each direction (forward/aft/top/bottom) and stopped when the wing would no longer react positively. That led to the shape shown in the figure below.

While bigger is usually better with endplates (because it acts in the same way as increasing aspect ratio), it is not always the case. It usually compromises efficiency as you add surface area that isn’t being utilized.

Extended EP.JPG

After some more tweaking, I finished at the final shape shown below. As you can see, it has the same silhouette as the current endplate, just bigger. Russell pointed out to me that they matched the bottom of the endplate to the pressure distribution of the wing, which resulted in a drag reduction. I hadn’t heard of this before so I tried it with and without the curve and it really did work (learn something new everyday)! I noticed a noticeable drag reduction with that design detail. Yet another detail which really impressed me with Aeromotions!

Gurney.JPG
final shape.JPG

After all is said and done, you can see the final results below. I did not expect such significant gains! It’s probably the most I’ve seen from all of my endplates. The best part is the linearity of the wing was maintained, so it should be just as easy to adjust as ever for the desired aero balance.

These took about 3 weeks to finish and over 100 CFD runs, but definitely learned a lot in the process. The next step is to get some of these machined!

Final Results.JPG

Next in line is the APR GT250. Sorry for the long wait, but we’re almost there!

UPDATE: Finished product

20200726_195951_resized.jpg

Maxxis RC-1 R2 Review

With track season finally started, I was able to check out the new Maxxis RC1-R2 compound. I haven’t seen many comparisons online so I decided to make a quick post on my thoughts. Before I get started, I want to try and outline the test conditions before and after. Both days were at Mid-Ohio with NASA TT in my Honda S2000.

Test Day 1 (before):

  • 2800lbs, 205 average WHP

  • 255/40/17 Hankook RS4, about 10 track days/6 months old, 28PSI cold, 17x10 SA72R

  • 3” Front splitter

  • Rear toe arms for bump steer correction

  • Best pro course time: 1:40.5

  • August 25/26, 2019, 55L/75H temps, tail end of season

Test Day 2 (after):

  • 2910lbs, 205 average WHP

  • 255/40/17 Maxxis RC-1 R2, first track day, but drove them 200 miles to event, 32PSI cold, 17x10 SA72R

  • Front splitter removed

  • Rear toe arms removed

  • Car was caged in the winter (what contributed to weight added)

  • Best pro course time: 1:38.5

  • Best club course time: 1:39.6

  • May 30/31, 2020, 50L/70H temps, first track day of the season, first time course was opened because of COVID-19 so track was very green, as were drivers

When I was running my RS4s the Hoosier guys in the class were consistently a good 3-3.5 seconds faster than me on the same weekend, which is to be expected. What I found from the RS4 was that it took a good 1-2 laps for them to come to full temp, then they would be at peak performance for a couple laps, after which they would promptly fall off.

As for the RC-1, I quickly was able to get them up to temp midway through my outlap. I do persistent braking and a minor amount of weaving. I try and scrub the tires through the technical sections as much as possible. What I found was they quickly got to temp and gave me confidence right away. I was expecting them to take a full 2 laps to come to temp. It was obvious that on the green flag first lap I was up to temp and the Hoosier R7 guys in front of me were not because I would quickly catch them.

Also, throughout full 15-20 minute sessions, they did not drop off AT ALL. I actually set most of my fastest laps on the tail end of the sessions, unlike most guys running A7s or RE71R/RS4. Not once did I overheat them and have to do a cool down lap. I was very impressed and it really allowed me to make the most of my sessions.

I bought these back in September 2019 and they’ve sat in my closet ever since but back then they were $550 shipped for a set. Unfortunately they have gone up in price quick significantly since then to around $800. Even with the price bump I would definitely buy them again. They are easily ~3 seconds quicker than my RS4s and they don’t have as big of a gap to the R7s as the previous compound did. Even RE71Rs were quicker than the R1 compound, but there is no way that tire can keep up with the R2s.

The other benefit is the very favorable contingency with NASA. Only 5 people required in class and even 3rd gets a free tire.

Obviously I don’t have any data on their longevity yet, but I will be sure to update this post at the tail end of the season. I expect them to wear like rocks like the previous compound.

As you can see from my video below, they are quite good at communicating the limit. They are audible unlike some full slicks and don’t just snap on you when you go over the threshold. They were actually quite easy to drive on.

I’ll get some more thoughts down after my next track day, but feel free to let me know if you have any questions!

IMG_20200317_190256_01.jpg

FR-S Quick Front Downforce Study

I recently built a sealed FR-S front end to be able to develop some new products and run front downforce studies. The first thing I did was see the gains of running full cooling blockers on the front end. I analyzed these three cases:

  • OEM front bumper with default center cooling inlet, OEM fog lights with bezel

  • OEM front bumper with default center cooling inlet, my brake ducts on the fog light bezel

  • Blocked center inlet and smooth blockers on fog light bezels

  • Cases ran at 100mph, flow directly in longitudinal direction, stock ride height

What I found was that running full blocking would be a full 47lbs of downforce over the OEM setup. While this is unrealistic because we need center radiator cooling, it shows that there is potential there with some optimization.

While I recommend running brake ducts for much longer pad/rotor/bearing life, there is some easy performance to be had just by removing the factory bezels and smoothing out the inlet with an easy sheetmetal cover.

As for the center, even though the center inlet looks big, the top 1/3 or so is actually fake grill that is covered by the factory inlet. Making an inlet duct from the front bumper that allows full flow into the radiotor/condensor without leakage would allow a portion of this to be blocked while still getting the same CFM. This would also be NASA TT5 legal, which is a class that is very hard to find front downforce.

I ran this study really quickly but if there are any questions or specific cases you guys would like to see, either post below and just send me an email. I’d like this blog to turn into a forum where we could bounce ideas off of each other.

Thanks!

ISO Profile.PNG
Side Profile.PNG

Product Updates!

Over the past couple months instead of making new parts I’ve been working on updating our old parts to be even stronger and better. I even was able to cut costs on a few items and lower my prices!

1.AP1 Front Brake Ducts

The first big update came on AP1 front brake ducts. They used to be mounted from the front of the bumper and bolted on, but I recently took a mold of the AP1 bumper and swapped to a reverse mount like the AP2. This is beneficial because I can now offer a 3” version and the nozzle is much more efficient.

IMG_20191212_202100.jpg
FB_IMG_1576613735682.jpg
FB_IMG_1576613750222.jpg

2. AP2 Cold Air Intake Option

Due to a request from Jose Suero, 2019 NASA Honda Challenge National Champion, I made a custom profile for AP2 ducts in order to clear an installed cold-air-intake. It took several iterations to finally fit but we got it! Performed great at nationals and verified brake temps by Jose! Just send me an email after ordering and I can make the CAI option for you!

Resized_20190728_133452.jpg
IMG_20190731_063106.jpg

3. Splitter Quick Release Brackets

Now updated to be much stronger and easier to install. Over 3X thicker than before and easier to produce.

4. Front Upper Control Arm Offset Bushings are now available!

After a few months getting manufactured and nailing down tolerances these are now available to order. Track tested by 4 different cars and have been working flawlessly! Get yours now while they’re still in stock!

IMG_20200111_120621_01.jpg

S2000 Brake Duct DIY

For anyone wondering how to install my ducts, a member of the S2000 community and previous Baero customer recently made DIY videos on my parts. If you were on the fence because you did not know how to install the ducts, the videos below show in great detail exactly how everything is done, where to buy them, etc.

Take a look!

Baero Offset Upper Control Arm Bushings Group Buy

Recently I bought a set of the popular offset control arm bushings for our cars, but after install and reading some reviews online, I decided to make my own set. The parts I bought were very loose to the control arm inner diameter and could be easily pressed in by hand. While this makes install easy, it is not ideal for on road/track use. The bushings should be properly pressed in and not have any slop. Other users online started to notice that the bushings began to wallow out and have slop in the upper control arm, while others were having too much stiction to the mounts.

This led me to make my own set of both bushings and inner sleeves. What I found was that a harder press (achieved by tighter tolerances) made a big difference to these parts. The inner sleeve should also be properly pressed into the ID of the bushing in order to not develop play. They should not be installed by sliding them into the control arm and then installing on the car.

NASA rule changes also forced me into the upgrade. I used to have lower offset ball joints for additional camber, but that is now a points hit for TT5/ST5. The upper control arm bushings are class legal (with no points hit), while also giving additional wheel/fender clearance.

I am making a few sets for friends so I figured I would open it up for a group buy, much like I did for the Baero BBK (which was SOLD OUT and a big hit!).

If 10 people were to join, price would be $175 a set.

If 15 people were to join, price would be $150 a set.

UPDATE: Parts are now available to order!

MVIMG_20191212_141939.jpg

86 Platform Parts Coming Soon!

With the racing season over and winter now upon us, the S2000 is sadly stored away. I want to take that opportunity to try and grow Baero into other platforms and be able to reach other users with our affordable and unique racing parts. My daily driver is a 2014 FR-S, which lends itself perfectly to the cause. It is also a wonderful platform and growing rapidly in the racing community.

Over the past couple weeks I have been working on getting CAD together for the car and almost have a half-car CFD model ready for baseline testing. I also have a lot of suspension and brake geometry put together, which should make development a lot easier than it was for the S2000.

Here are a couple pictures of what I have so far:

FR-S.PNG
FR-S2.PNG

I am almost done with making front brake ducts for 2013-2018 FR-S models, and should have those ready on the site this weekend! I want to make rear ducts for the car before I start delving further into the platform.

If you have any requests or products that you’d love to see for the platform, feel free to comment or reach out to me directly!

P.S. S2000 development is far from over!

Version 2 S2000 Rear Brake Ducts Are Live!!

After customer feedback and over two years of track testing on 100+ S2000s, I have updated the design of the S2000 rear brake ducts. Upgrades include:

  • Over 25mm slimmer than the old design. This will make them last dropping a wheel in the dirt or having a 4off situation.

  • Underbody seal which makes the lid unnecessary. Having the duct fully sealed helps extract full performance and negates losses

  • Improved strength. The cross section is now thicker and grain direction has been reversed to go against where most failures occurred

  • Less parts so duct is now lighter and easier to produce/install

Version 1 rear brake duct owners get 50% off when upgrading. Email me for discount code.

IMG_20190912_165001_036.jpg
IMG_20190912_165001_037.jpg
Old vs. new

Old vs. new

Installed view showing the slim profile

Installed view showing the slim profile

Installed view showing duct routing

Installed view showing duct routing

Baero BBK Do-It-Yourself Wilwood Kit - Group Buy

A few S2000 forum members have reached out to me to develop a DIY BBK kit for our S2000. I have done with for a few cars already in the past so I know the logistics of making it happen. For the money it is a great kit and gives the power to the consumer. Many companies make a profit by operating as the middle man, so that would be eliminated and transferred to you.

In order to make a batch, we need a group of 10 people to get pricing to work. A set of rotor hats and brackets would be provided, then you would piece the rest of the kit together. The rotor hats and hardware are $400 for a set. This includes mounting hardware. The kit would work as a pre-order so payment will be required up front. Since this requires a large batch to get good pricing, this kit will not be for sale on my website full-time, but offered as a one-time batch.

This kit is designed for the following parts:

Calipers: Wilwood Forged Superlite - $350 - https://www.summitracing.com/parts/wil-120-11130

Brake Lines: Wilwood Brake Line Kit - $73 - https://www.summitracing.com/parts/WIL-220-9199/

Rotor Rings: AP Racing 325x32mm Rotors - $500 - https://www.essexparts.com/ap-racing-j-hook-rings-32532LH ; https://www.essexparts.com/ap-racing-j-hook-rings-32532

Rotor Hat Hardware - AP Racing - $50 - https://www.essexparts.com/10bolt-disc-hardware-kit

Pads - Hawk DTC60 (as an example) - $153 - https://www.ebay.com/itm/Hawk-DTC-60-Disc-Brake-Pads-HB521G-800/182281914687?epid=220194371&hash=item2a70d9493f:g:OAYAAOSwYIxX2e7X

By buying the consumable parts yourself, this kit is ~$500 cheaper than comparable sets on the market. This is the kit I have ran for over 10 years on numerous cars and it works flawlessly. I am on the end of year 2 on the same set of rotor rings (~60 track days so far). I just changed my pads for the first time in 2 years. Wilwood uses a 20mm pad shape which is super common. They last a long time and are really cheap. I use the 1.38" piston diameter calipers, but the beauty of this kit is you can buy the bigger pistons if it suits your platform better.

The rotor hat and bracket will be made of 6061-T651 aluminum. The bracket will have helicoils installed so you don't have to worry about ruining the threads with steel bolts. 

Group buy slots:

1.

2. hawkeyegeoff

3. jlee

4. spaded_racer

5. ncrx

6. nate_tempest

7. joey_nguyen

8. mpoganski

9. Zer0ne

10. nb12

Assembly view with Wilwood Superlite Caliper and 325mm Rotor:

IMG_20190802_205857_855.jpg

3D Model of Mounting Bracket:

Bracket.JPG

3D model of Rotor Hat:

Rotor Hat.JPG

If you’re interested or have any questions, feel free to comment or email me directly!

UPDATE:

Parts are now delivered and SOLD OUT. If you’d like me to make another batch, please email me to get on the list and I can start a second batch.

As promised, I am going to post links for people to make their own if they’d like. Please use these google drive links to get the .STP files and drawings.

https://drive.google.com/open?id=1UGQnfJDvMGPLG-ybleqlOsigtNOZ3mbJ

ApexPro Track Coach Review

I recently reached out to ApexPro to try/rent their driving coach and wanted to provide my thoughts. Just as a disclaimer, they are not paying me to do this review nor do I have any affiliation with them whatsoever. I just want to improve as a driver any way I can and have seen numerous guys at NASA events that run them. I have used it for a total of 3 track days, all at Gingerman Raceway, and all with the same car setup. I’m going to divide the review into three segmants: hardware, software, on-track - followed by my overall review with suggestions.

What I am mainly using as a comparison is my AIM Solo2 since that is what I use as a lap-timer and data-logger.

Hardware:

Being a mechanical engineer by trade, the first thing that I noticed was the hardware. In pictures it doesn’t look anything special since it’s just a rectangle with lights, but in person it’s actually a pretty impressive piece. The button on the side is very easy to use and just requires a simple click. I did not have a hard time turning it off/on while on grid and wearing my driving gloves. GoPro cameras can learn from this on how difficult they are to function when you’re all strapped up.

IMG_20190607_220132.jpg

By far my favorite feature of the entire package is the quick release mount they use. Maybe other products use this and I’m just out of the loop but I haven’t seen it before. It magnetically sits into the two rods and is very easy to remove and reinstall, while keeping a firm grasp. This is something I wish both my GoPro and Aim Solo 2 used. I freaking love this mount!

Software:

The software is where I have the majority of my pros and cons. I’ll start with the good. First and foremost, it is very easy to get setup and ready to go. Once the mount is on the dash or windshield (windshield mount included) then the last step is just opening the ApexPro app and calibrating the device. This only takes a couple of seconds. It recognizes the track automatically and faster than both Harrys, Racechrono, and my AIM Solo do.

You can setup a profile so that you can track your best times with online leaderboards and brag to your friends. This is becoming a popular feature with other laptimers so it’s nice that it’s included.

Google image to show an example.

Google image to show an example.

I grabbed a screenshot from Google to show what the phone recorded data looks like. It gives you an overall score on your session, along with standard laptimer features.

The session review software is VERY easy to use and much more intuitive than others that I have used. It took me a little time to know how to use my AIM Solo software and requires my laptop to come with, or that I look at data post track day. It was nice to be able to see my data right after a session and take that knowledge with me to my next session. I know I can have this if I bring my laptop but I like to bring as little as possible to a track day. I was very impressed by this and believe that they should advertise this part of their product a little more.

Now onto the bag things about the software, and this won’t relate to everyone. The app is iOS only, so no desktop or Android support (for now at least). While this won’t affect everyone, it did affect me. I had to borrow an iPhone from a friend (reason why I grabbed a Google image above) in order to datalog. You can still use the lights on track without datalogging, but it does not record any data without the phone. This is a bummer for me because I am not willing to buy another device that I have to charge/bring with me to a track day, and there is no way I will switch to iOS. They are a fairly new company so I hope Android or desktop support comes down the line, but this was a major pitfall for me.

On-Track:

My first time out with the ApexPro installed I forgot all about it. I am a very audible person and didn’t register the lights at first. As you can see below I have it mounted to the left of my steering wheel where I have an A-pillar blind spot. I have a shift beeper installed and rarely look at my gauges, speedo, tach. I usually rely only on sound, therefore it took some getting used to.

Once I made a more conscious effort I started to notice the benefits. It was pretty cool seeing a visual indicator whenever I would push a brake zone, or when I would carry more speed into a corner, etc. It took a few laps to calibrate itself to my driving but after that it was pretty accurate. It also took a few sessions for me to understand what lights before, during, and after a corner meant and I had to refer to their guide a few times before I got it all. It’s a pretty sophisticated tool and really does help.

Usually I get this feedback from the car or the +/- on my AIM Solo and it was pretty in sync with both of those options. The light colors and brightnesses are customization to your preference. I could definitely see this allowing you to improve as a driver, especially if you want instant feedback. Morning sessions are usually the fastest so having feedback for the later/hotter sessions isn’t very useful sometimes.

I was using a used unit, but the battery did die on me. I had it fully charged before the weekend and it died after four sessions. I would turn it on at grid and off once I turned the car off, so about 100 minutes of driving time. That was a little disappointing since I did not have the means to charge it and had to resort to not using it for the rest of the weekend. For comparison, my AIM Solo2 was at 65% of charge during the same usage period. I usually charge the Solo2 before a track weekend and never touch it again. I also have a hardwired charger in the car for emergencies, so I would have to do the same for the ApexPro.

Overall Impression:

In conclusion, I would both recommend and not recommend the unit depending on your personal situation. If you do not currently have a dedicated lap-timer and own an iPhone, then I would recommend getting this unit. The price seems steep at first, but it does have value. It will give you tips on how to improve real time, and those tips are accurate. The datalogging feature seems like the best I have seen thus far, and the social aspects make it even more fun.

If you do not have an iPhone or already own an AIM Solo or something similar, then I don’t think the Apex Pro offers enough to justify the cost. Without the datalogging, there isn’t much meat to justify the cost. Then if you own an AIM Solo, like in my case, it does a lot of the same things, but by using two different devices. I like as little things as possible as everything needs to be charged, setup before a session, and monitored. I think their way forward should be having a timing display below the lights and packaging it into one unit. Then I could just replace my AIM Solo, but I am not going to go back to running both a phone and the APEX Pro.

I hope this is helpful and helps on your purchase. If you have any questions, feel free to post or reach out to me.

FR-S vs. S2000 Track Review

I finally got around to taking my daily driver Scion FR-S to a track day. This car is regularly compared to the S2000 so I figured I would give my thoughts/opinions on how the two compare and which is the better car. Initially I thought I would compare the two only on track, but I want to give my insight on how both fare as a daily driver as well.

I have owned my AP1 S2000 since 2011 and daily drove it completely stock for at least 5 years. I tracked and autocrossed it stock as well so I think I have a fair gauge on it’s capabilities. I also took the car to the Tail of the Dragon several times. This past weekend at NYST S2KTakeover I also drove my student’s stock AP2 and it really reminded me of just how capable these cars were stock.

Here is a picture of my car at the dragon from 2014.

The FR-S I bought around a year ago now. It currently has 30,000 miles and is a 2014 model. It only has one modification on it being Feal 441+ Coilovers. I bought the car with lowering springs installed so I swapped them out for the coilovers. Other than that, the car is completely stock. Tires were 245/40/17 square Hankook V12 Evo’s and Powerstop track day pads.

The track day I attended with the FR-S was at NASA Mid-Ohio, running in the HPDE4 group. It is quite obvious that the car lacks power compared to the S2000, but that doesn’t necessarily mean it is not capable. My initial reaction was how easily the car was to drive. I’m used to the S2000 being super edgy and on rails, but this was quite the opposite. The car definitely tends to understeer, whereas I don’t think I’ve ever felt understeer on my S2000. I felt push on almost every corner, except the sweeping turn 1 and turn 11 being high speed corners. The car definitely started to rotate a bit more at high speeds, which is the opposite of what my driving style likes. I prefer low speed oversteer and high speed understeer if I could have my choice.

The steering feedback is better in the FR-S, which makes sense since it’s a decade newer. The stock seats were also very capable and I never felt like I was moving around a lot. I have a Sparco Circuit in the S2000 so I was expecting to feel like I would barrel around. The stock brakes were also awesome. I had ATE 200 fluid and Powerstop pads installed, and I only felt fade at the end of sessions. Mid-Ohio also only really has one tough braking zone so I’m not sure if I could give an accurate review of the brakes at this point. From what I felt, they seem very capable and do not need to be upgraded.

Being a momentum car, the car did feel slow on any sort of straight-away. However, the S2000 has never felt like it needed more power to me. I find it to be the perfect blend of speed. It’s fast enough to be able to embarrass other cars, but slow enough that it’s not going to get you killed if you run out of talent. I find the FR-S to be slightly outside of that fast enough threshold and do wish it had a little bit more to give.

Here are some sweet track shots:

JB-mid_ohio-4-15-19-43-(ZF-10226-81464-1-001).jpg
JB-mid_ohio-4-15-19-88-(ZF-10226-81464-1-002).jpg

With all that said, I was super surprised that I did a 1:47.x with the FR-S. The TT5 winning times were in the 1:40ish range and I am sure I could have done that if I was also on Hoosiers and actually prepped the car. When I got home I immediately ordered new sway bars to be able to adjust the balance. If I could dial out some of the understeer and get this car to rotate it would be a monster.

I may be a bit biased being a diehard S2000 fan, but I do find the S2000 more fun in almost every way. On track it is way more fun, but also much harder to drive fast. On the street it is way more fun since it is a convertible, but also much louder. The gearing on the FR-S is also much better suited for a daily driver. It feels snappy and has low-end torque. I am a big ND Miata fan and am already planning on how to get on in the garage, only for the reasons that I like to daily drive a convertible.

The one big thing that I think the FR-S has over the S2000 is the back seats. I am a roadster guy through and through. I never have people in my backseats, but the ability to bring an extra set of tires to the track is HUGE. I have Hoosiers at home for the S2000, but still haven’t run them because I don’t have a way to transport them to the track (I don’t have a truck/trailer). I fit 4 loose tires and 4 loose wheels in the FR-S without even touching my driver’s seat. I can fit 4 track wheels, my jack, tools, and luggage for a track weekend in the FR-S without compromising me or the passenger. I am very envious of that fact and I think it is a big thing to consider if you’re cross shopping these cars.

Both are awesome cars. If I could have one, it would take me about 2 seconds to pick the S2000, but the FR-S is truly great and I love it as a daily/occasional track car. Here’s a video of one of my laps from Mid-Ohio for you guys to enjoy.

Voltex Type 7 Baseline Results

I’ve had a few guys ask me to run analysis on the Voltex Type 7 wing as it’s really hard to find CFD data online. Finally, I’ve had some spare time to actually work on this and the results are actually pretty good. The plots also show that there could be significant improvement from better endplates. You can see the pressure leaking out by the small endplates in the surface plots.

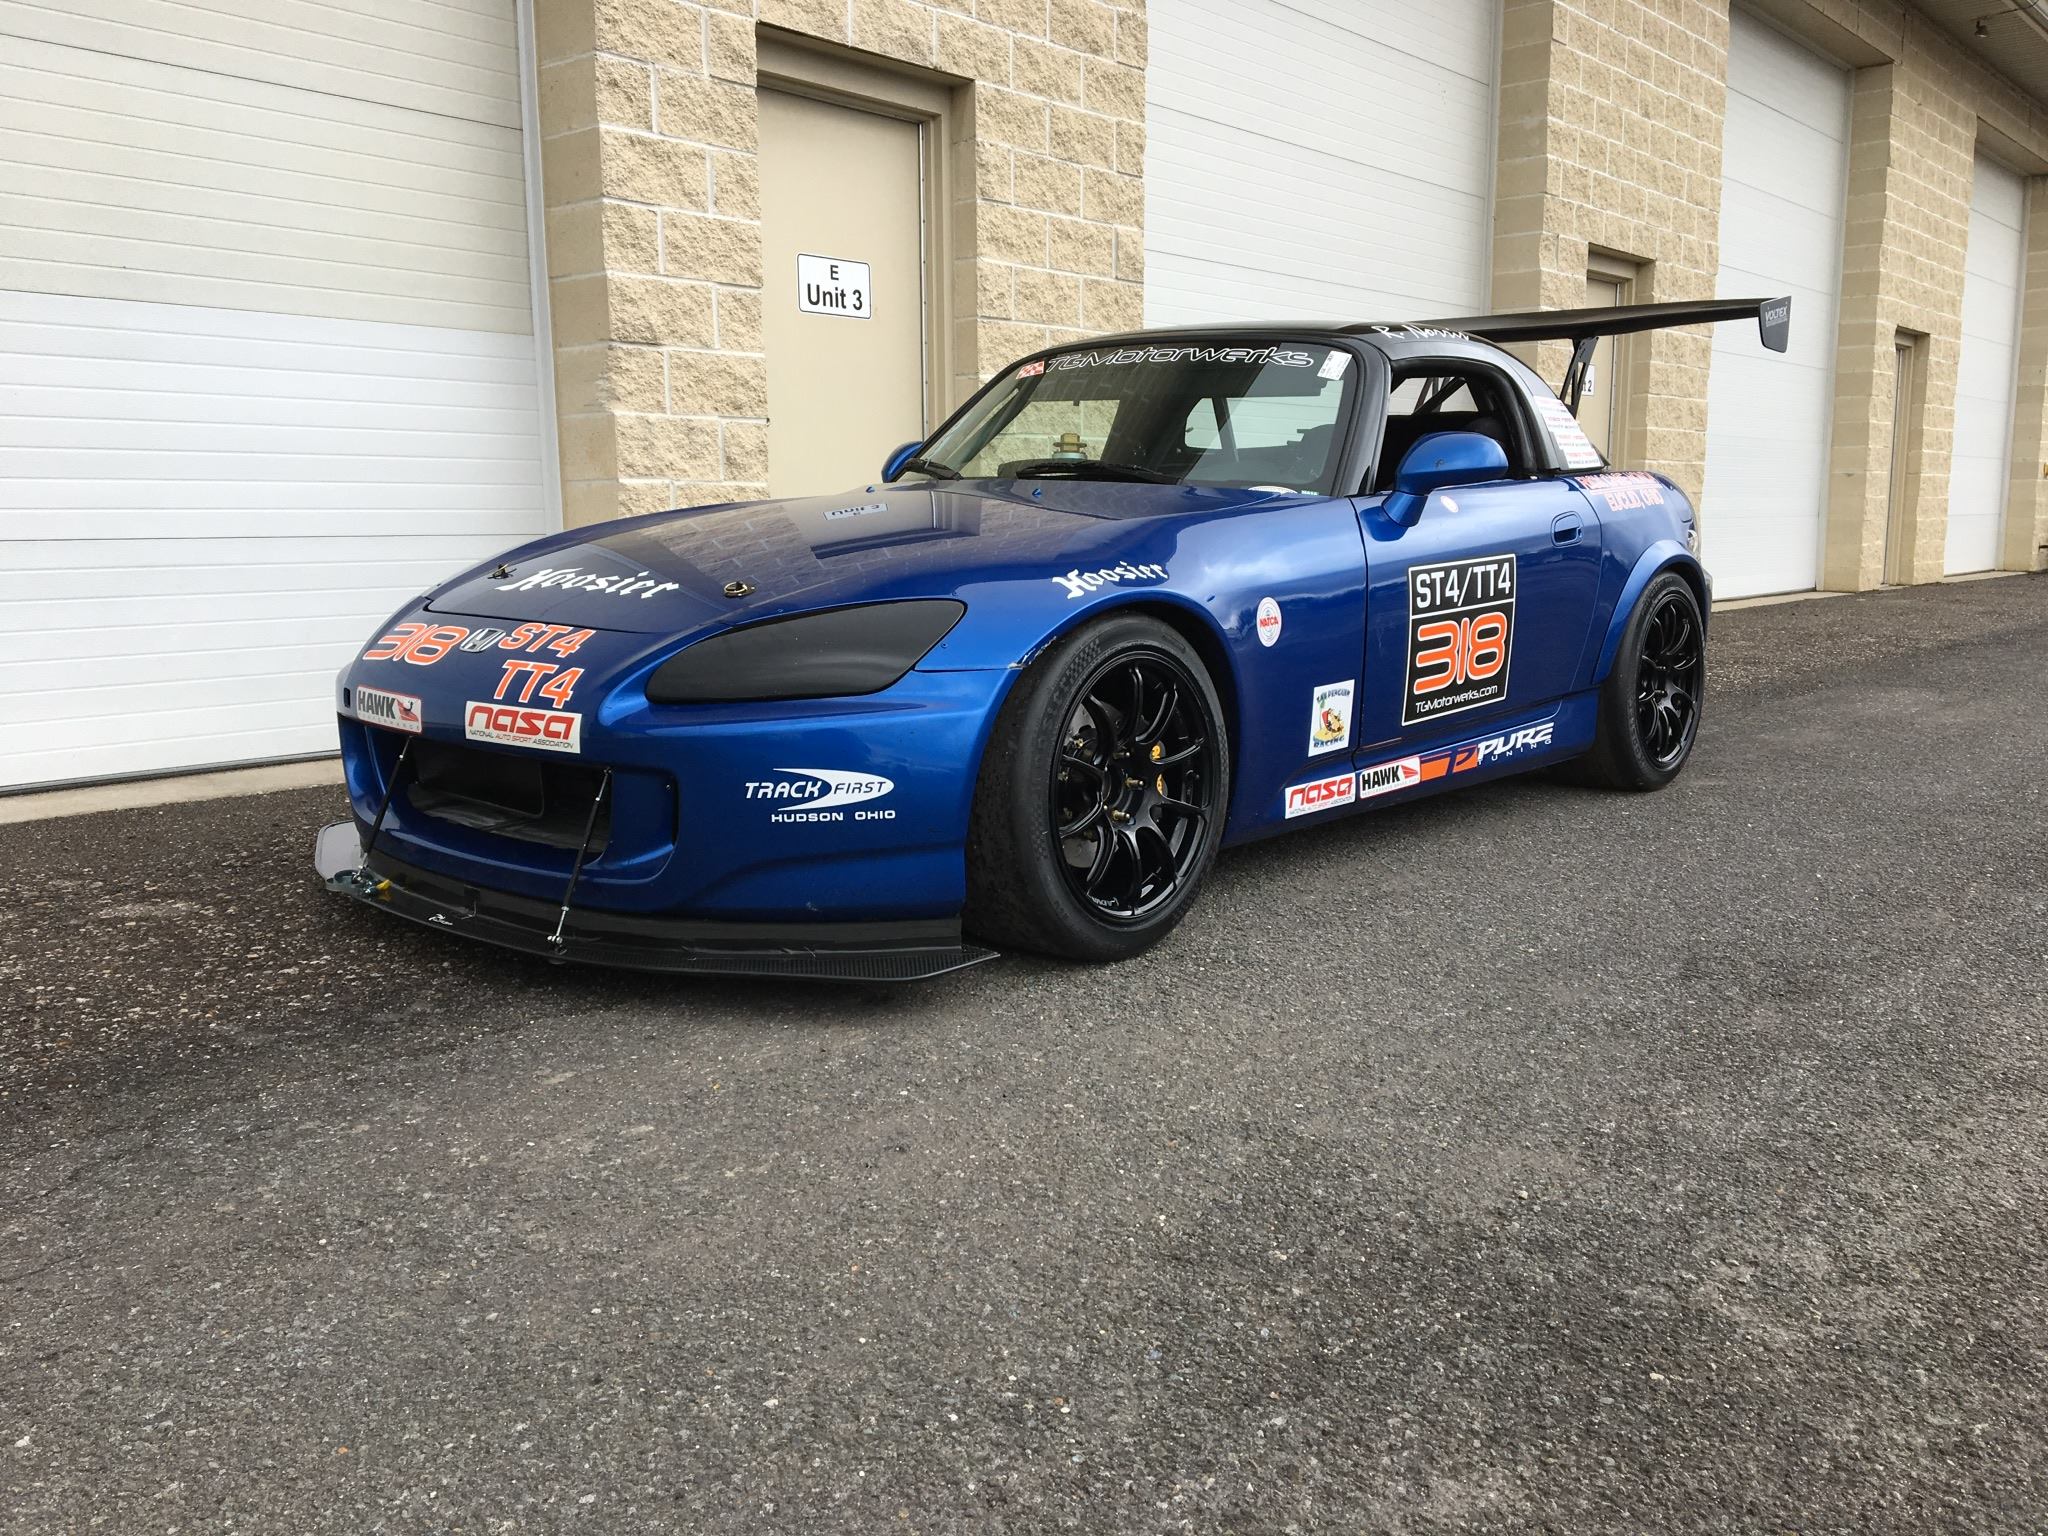
The main credit for this has to go to Rick and his beautiful NASA ST4/TT4 S2000. He provides all of the measurements and photos I needed to model up the wing. The analysis is mainly to improve the performance of his car as he gets ready for the upcoming season. I can’t wait to see what the actual track data will show and his impressions.

Also, fair warning, I only worked on the baseline results tonight and decided to post ahead of time. I haven’t started actual endplate development yet, but the hard part is done!

Customer car the endplates are being designed for

Customer car the endplates are being designed for

First thing I’ll go over is the model generation. I got hand measurements from Rick and tracings of the airfoil, endplates, and mounting holes. With this I generated my 3D model, as seen below.

Model.PNG

As for the gurney, a potential customer was very curious if a gurney would be beneficial for this wing. Voltex sells an optional gurney, but does not provide data. Kind of weird if you ask me, but whatever. I couldn’t even find a picture of the product they sell. So what I did was just added a vertical 7mm gurney to the wing.

I guess now I can dive into the numbers. I am going to post plots of the downforce vs. speed/AOA, as well as drag and L/D for the same parameters. I only ran the gurney at 0 AOA, but at the various speeds. The plan was to run more if the results were promising, but I think we can agree that it’s better to just leave it off.

DF.PNG

As you can see, the increase of AOA results in a pretty linear increase in the three parameters. The wing is definitely more efficient at lower angles of attack as can be expected. The performance of the gurney isn’t so hot, however. I would pass on that option.

I was surprised the wing produces more downforce than the 9Lives wing, although it is not as efficient.

Here are some other plots of the results, including the cut plots, surface plots, and the streamline.

Cut plot at the center of the wing.

Cut plot at the center of the wing.

Surface plot of the pressures. I think bigger endplates will serve this wing nicely.

Surface plot of the pressures. I think bigger endplates will serve this wing nicely.

Flow trajectory through the wing.

Flow trajectory through the wing.

Sometime in the next two weeks I’d like to be able to release my endplates for preorder. My goal is to be able to reach 10AOA efficiency at 0 AOA with my endplates installed. I have a feeling this wing will react well to trapping more of the high pressure air on top of the wing. It seems like it is leaking out a bit and reducing downforce. I plan on rerunning with the gurney and new endplates as well. The trailing edge isn’t seeing much pressure so maybe the gurney will be more useful with different endplates. Right now it is a little above the endplate itself.

Stay tuned!

How to get into SimRacing!

I’ve gotten several requests to detail my SimRacing setup so I thought I’d create an informative piece on how to get started. Before I begin, I spent a lot of money on this setup. That doesn’t mean you have to match it, this is just what I thought was the best for the money and met my requisites. It is neither the cheapest nor the most expensive setup on the market, but in my opinion it’s the best.

First thing to get started is what system(s) you would like to build this for. If you’d like to play on PS4 or XB1, it’s much cheaper, but you do sacrifice some of the higher end perks such as high frame rate (kind of needed for racing games), VR, and triple monitor support. However, the main drawback to consoles is the game selection. They have Forza, GT, and others, but PC really shines because of mod support. One of my goals is to practice tracks that I will actually race on. Forza is the only console option that has Sebring, VIR, Road Atlanta, and most other US tracks, but the physics in the game are pale compared to others. Right now I am racing with Assetto Corsa, which has all of those tracks available through user created mods. I am mainly practicing Mid-Ohio for NASA this year. Once I get a little more serious I’ll look into iRacing.

Once you decide your system, then decide on a cockpit. For this choice, I’m going to go out on a limb and say there is not a single product better than what I’m going to recommend: GT Omega Cockpit.

The one I bought is here.

I got the top of the line Supreme cockpit with the RS9 seat. You can save some cash by going with the RS6 seat and with a single monitor if you’re using it with your TV or VR. I am doubling down this cockpit as my computer desk, so I went 3 monitors. I did some searching online and there is nothing of this quality in the $700 range. This includes tax, shipping, the seat, and everything seen in my pictures. It is predrilled for almost all setups on the market so installation is easy. When I was putting it together I frequently couldn’t figure out how they’re making any money. Everything is steel, powdercoated, and hand welded. It’s expertly designed in ways that allow easy installation and adjustment. They’ve really thought of everything on this one. It has extensions for tall people as well. In the standard configuration I (5’11”) and my girlfriend (5’5”) was able to sit comfortably with the pedals and wheel. I’ll explain some more of the features individually in the pictures.

Overview 1.jpg

Overview of my entire setup. The posts behind the seats are for computer speakers, which I have not gotten yet. The shifter can mount on either RHD or LHD sides. It’s a very modular setup with easy configuration. You can also pass on the monitor stand if you’re putting this in front of a TV.

Desk 1.jpg

The keyboard drawer slides/rotates out of the way when racing, but can be brought back quickly when in PC mode. At the top left of the picture, that is a static shelf for a main speaker.

Desk 2.jpg

Rear view of the monitor stand. Everything looks complicated, but it can be broken down quite easily and without any tools. I wouldn’t be worried about moving this if I were to move again.

Slider 1.jpg

The seat has a slider and recliner just like a regular seat would. Both work very well. The seat is a really nice vinyl. Looking at the back of the seat, a lot is made of hand turn setscrews so it’s really easy to take apart and readjust without tools. Top right corner shows the cupholder, not even my S2000 has that!

All in all I very much recommend this cockpit. I don’t think there is a better one for the money. Please send me the link if you find one.

Now I’ll get started on the electronics. This is where things get a little complicated as there a multiple manufacturers and options. Before I dive in, when you nail down what you plan on buying, look on your local classifieds and see if anyone is selling. These things are like treadmills where half of the people buy and never use it. It’s an easy way to save some money.

From my research the quality goes Logitech -> Thrustmaster -> Fanatec. Fanatec is by far the best stuff on the market, but pricey for sure. I tend to buy higher end stuff so I went Fanatec. I wanted something as close to a real car as possible as I want to practice during off weeks.

What I ended up buying was the Fanatec CSL Elite bundle (S700) found here. I bought the PS4 F1 version as I wanted the option to play on my PS4 if the need arrived, but I doubt I will ever do that. One thing to make sure to buy is something with the loadcell equipped. This makes braking very realistic and you have to actually stomp the pedal. For a little more money, you can piece the CSL wheel and the Clubsport V3 pedals, which are superior. If I were to start over, I would go that route over buying the CSL kit with the added loadcell upgrade. This is the upper middle class of racing wheel setups before getting into the $1k+ range. The force feedback is very realistic as is the wheel weight. It changes for every car and road surface. Going over rumble strips will shake your soul just as in real life. It’s a really top class setup and I have no regrets going this route. I went with the F1 wheel because I’m a F1 fanboy, but the circular wheel works just as well. They are swappable should you want a few.

If you have a quick release on your wheel you’ll know exactly how to operate this setup. Everything is expertly constructed and metallic. There is a reason this stuff is this price, it’s not your average plastics. The wheel is real suede, just as my Personal wheel in the car.

Here are the pedals with the loadcell kit. The bushings are replaceable so you can fine tune your brake pressure. Everything is machined aluminum, then powdercoated.

I also bought the Fanatec shifter. This might be my favorite piece of the setup. Paddles are included in the wheels, but I like to practice rowing gears and heel/toe. This thing is incredibly high quality. Metal gates, push down for reverse and 7th gear. It comes with not one but two real aluminum shifters. I plan on putting the taller one in my S2000 as I’ve been looking for something taller anyways. The shifter turns into a sequential with the flip of a switch and also has adjustable shifter tension.

To give an account of how realistic this is, my girlfriend is using the setup to learn how to drive stick. You can stall, and the wheel shudders as the car would when you’re not smooth enough. This would’ve been awesome when I was 16. In the short time I’ve had this, I have already gotten much better at heel/toe. I had it down on the S2000 but would have some trouble in cars I wasn’t familiar with. I can now do it on demand even driving around town. Highly recommend adding this to your setup ($200).

Comes with two anodized aluminum shift knobs. Really makes you appreciate the price as that is $100 alone.

Shifter 2.jpg

With the turn of the knob you can change the height of the shifter position and slide it futher toward/away from you. This is great for having friends over and everyone being comfortable.

The final thing I want to go over is if you want to get into VR. I think this adds a great dimension to the setup and I really enjoy it. It’s not perfect since racing has such fast frames, but it’s a nice to have. It’s an easy way to entertain guests as well. The current requirement is a GTX 1060 graphics card. I run a GTX 1080 so I would recommend getting something a little future proof. I am using a Microsoft developmental VR headset, but if I were to buy I would get an Oculus. The sensors/controllers aren’t needed for racing games. Here is a video of me playing in VR:

If you have any further questions feel free to comment or email me directly. I usually research like crazy before buying so I have a lot of knowledge stored up. If my article helped in your purchase, please comment with the setup you decided on and why. Knowledge sharing will benefit us all!

Happy (sim)racing from Baero!

9 Lives Wing vs. The Competition

This past season I decided to change my APR GTC200 wing for the 9 Lives Racing version. My main reasons were the extra supports on the trunk, to be able to get increased downforce, and because I was pretty bored! Finally, I have had the time to run the same analysis on this wing as I did on the APR and Voltex wings.

This was done using the same setup. 0 angle of attack, 100MPH condition. Just the wing and endplates for all cases. All done on the same computer, using the same file. I want a direct comparison between the 3 without any extra variables. Everything was done to scale. This is for the 68” version of the 9 Lives wing.

Just as I suspected, it produces much more downforce than the others. Here are a few snips that I took, the first being a cut plot right in the middle of the wing showing pressure distribution.

The stock endplates are actually decent vortex generators. I can tell from the cutplot they are actually a little too small and could be positioned better. Some 3D endplates would go really well with this wing, but most organizations won’t allow it.

Here are a few graphs to showing my overall results. I included stock APR and Voltex, plus versions with Baero endplates in comparison to the 9Lives wing.

Same plot, except showing drag. If this was done on a full model, the 9Lives would do better than the others since it is in higher, cleaner air. Also, it is the only 2-D wing of the bunch. Even so, being on par with that much more downforce is impressive.

Drag Compare.JPG

Lift/Drag efficiency plot:

As you can tell I left a Baero 9Lives position wide open. I want to contact 9 Lives first and see if they are okay with me producing endplates for their wing, as I know they have other suppliers that do that sort of thing for them. Regardless, I will be making some for my own car, so stay tuned for results!